

Matt Preston’s No-Knead Bread
This recipe produces lovely bread with minimal time, fuss, effort and worry. It really does work!
- Five minutes maximum to combine the three dry ingredients (flour, yeast and salt) and stir in some water.
- Four hours (or longer if desired) covered in the fridge.
- Five minutes to shape your rolls or loaves and get them into the oven.
- 30 to 60 minutes cooking time.
- A minute or two to take your first bite!
Preston calls it his “cheat bread” and says this recipe “breaks every single rule you will learn at culinary college … this recipe should not work, but it does. … with this bread there is no need to knead it.”
Here is a photo of our first attempt at his bread rolls.

And the recipe provides plenty of opportunity to experiment (see examples at the end of this blog post).
If you don’t want to read the background notes, you can go straight to the base recipe below: No-Knead Recipe. However, the background should prove useful. And check out some of the variations at the end – updates are added from time to time.
Some issues with making your own bread
Many of us have tried, and failed, to make bread that is not just delicious but is also lovely and light, aerated and crusty, like you get at the bakery or local bread shop.
So is it possible to create such a loaf without too much effort or angst?
My best memory of fresh bread is as a kid on the Tamar, many years ago. The Launceston based baker would deliver bread three times a week on his run into the countryside: Monday, Wednesday and Friday. The bread was the most beautiful I can remember. When we arrived home from school, we would break a loaf in half and pull out some of the doughy centre and eat it like that or slather it with butter and vegemite or with Mum’s tomato relish.
Advance a decade or two, which included introduction to breads of all sorts …
In the 1980s I began making sourdough bread using a starter and only flour, salt and water as the ingredients. It gave a beautifully tasting loaf, genuine sourdough, but it was always quite heavy with a thick (though delicious) crust. I made it for many years, with the starter lasting via refrigeration. However, a four-month stint travelling through Europe around 1990 was the end of the starter, which collapsed (via mould and dehydration) in the fridge.
After that, I would occasionally start another starter and we would have lovely (though dense and heavy) sourdough bread for several months, until I lapsed once again into ‘starter neglect’, which meant starting again.
The sourdough starter method was fine with a lovely flavour. But it did not produce the light, aerated bread I could buy. And it had two other drawbacks: it required a lot of kneading and working; and it took a couple of days to make!
Thus, I was always searching for other recipes or angles for making bread, sourdough or otherwise, trying and experimenting with numerous methods. However, I never really struck on a method that ticked all, or most, of the boxes and produced a loaf with “Wow” factor. Preston’s method, however, does tick most of the boxes!
You can go straight to the base recipe below: No-Knead Recipe. But it is advisable to watch Preston’s two videos on the technique first.
MasterChef Videos
In a 2013 version of MasterChef (Australia) Matt Preston gave a method for a no-knead bread that seemed to be ridiculously easy, but at the same time was apparently amazingly delicious. You only had to observe the reactions of the MasterChef contestants.
Preston’s method was repeated in 2017.
An Internet search will bring up videos of both the 2013 and 2017 presentations. The two recipes or methods are slightly different. Hence, the base recipe given below is based on key points from each.
Following are links to the two demonstrations by Preston: it is worth watching both to learn about his method. Note the slight differences in the ingredients and techniques he mentions.
From 2013: https://tenplay.com.au/channel-ten/masterchef/recipes/no-prove-bread-with-butter-and-raspberry-jam
From 2017: https://tenplay.com.au/channel-ten/masterchef/extra/season-9/matt-s-no-knead-bread
In 2013 he emphasised that the flour must be strong bread flour. ‘Strong‘ means flours with a content of 11% to 13% protein (mainly gluten, which enables dough to rise and produce a well-shaped loaf). It may be called ‘bread flour’ or ‘baker’s flour’ or just plain ‘plain’ flour but check for additives.
Try to find a reliable source who can inform you accurately about the protein and gluten content, and whether or not the flour includes other unwanted ingredients used to help rising, such as ‘bread improver’. In supermarkets it can be difficult to make an assessment as you will see ‘bread flour’ or ‘baker’s flour’ on a number of products, but it is not always easy to work out the actual ingredients or the protein content. The Lighthouse brand bread and pizza option is available in the bigger supermarkets and contains around 12% protein. We have used it with very good results and that might be your best starting point (http://www.lighthousebaking.com.au/). (In 2017 Preston simply says “flour”, while some Internet interpretations of his method say that the recipe does work with ordinary plain flour.)
There are very slight differences in the two video presentations. The recipe given below is based on the written version from the 2013 weblink, however we have upgraded it for any differences in the 2017 verbal version. The 2013 written method and video mention one tablespoon of dry yeast, yet the 2017 video says 14 g, or two sachets or two tablespoons. (We use 14 g of yeast rather than using tablespoons.) And in the 2017 version he says 1½ tablespoons of salt, rather than 1 tablespoon. (Your choice.) And in the 2017 version he says to refrigerate overnight or for a minimum of four hours.
This latter addition from 2017 is a revelation as it makes the recipe even more versatile and useful. Thus we have found that four hours is plenty of time for the mixture to double in size. This means the baking of this bread is much more predictable than for most other breads. Thus, if you want a loaf to come out of the oven at 7pm, you will need to have it in the oven by around 6pm, which means the dough should have been mixed and in the fridge five hours earlier at 1pm: four hours to rise and removed from the fridge at 5pm to give the dough one hour to come back to room temperature.
Note that if you want to make a single large loaf you will need to cook it longer than for smaller rolls. The bread should give a light, airy, open crumb (and, with some luck, a “Swiss cheese” one). It will be quite a moist bread because of the water content. It lasts well in the fridge and is delicious toasted. It can be frozen (especially the rolls).
The risen dough after proving is very sticky (see next photo) and hard to shape, so don’t spend too much time trying to get a perfect looking loaf or roll. Because it is so sticky, use baking paper, otherwise you risk having the cooked loaf adhere to the baking tray.
One kilogram of flour makes quite a lot of bread, once the water is taken into account: around 1700 to 1800 grams in total. Thus, half the dough will give a loaf of weight 800 to 900 grams or six rolls of that weight.
For this reason, in the recipe which follows, we give the ingredients based on 500g flour with the ingredients based on 1kg flour in brackets.
You could quarter the ingredients, but for the first attempt it is probably a good idea to try the base method with 500g or 1,000g of flour so you get a good feel for everything before making any variations. If you make six rolls you will find they are quite big; you could try making smaller ones, reducing the cooking time. You could use 1,000g flour and use half the mixture one day and leave the other half in the fridge for the following day; the method is that versatile.
(As we explore variations we will update the ‘Variations and Notes’ section at the end of this blog post.)
Matt Preston’s Recipe
If you haven’t already done so, it is advisable to watch Preston’s two videos: MC Videos.
The amounts given below are based on 500g flour, with the amounts for 1000g given in brackets. As the dough is difficult to shape, consider lining a loaf tin with baking paper and then simply tip the dough in – it will take its own shape in the tin.
Ingredients
- 500g (1kg) strong bread flour with 11% to 13% protein
- extra flour to dust
- ½ to ¾ (1 to 1½) tbsps salt
- 7g or one sachet (14g, two sachets)
- 475ml (950ml) lukewarm water
Method
Combine flour, salt and yeast in a large bowl. Stir in water until just combined and moist all the way through. The mixture will be quite firm but not sludgy. Cover with plastic wrap, then refrigerate overnight or for a minimum of four hours.
(It should about double in size, with a lot of aeration. It is a really wet, elastic dough.)
Remove bowl from fridge one hour prior to cooking, and allow to come to room temperature (but it shouldn’t be a disaster if you forget this step and bake straight from the fridge).
Preheat oven to 220oC.
You can work with the dough on baking paper or on another suitable work surface. The baking paper method is handy as it means you can lift it straight onto a metal baking tray to go into the oven. Alternatively, heavily flour a work surface to tip out the dough. The extra flour is needed because it is such a wet, stretchy, sticky dough. Tip or scrape the dough out onto your baking paper or work surface.
(In the videos Preston makes a large loaf and some dinner rolls using 1kg of flour. To do this, you will need to line two baking sheets with baking paper, and generously dust sheets with flour. To make two lots, cut or pull the dough in half.)
For a loaf containing 500g flour, reshape in a minimal way, pulling the dough together rather than kneading. Place onto baking tray. Or tip the dough into a 750ml to 1000ml loaf tin lined with baking paper. Bake in the oven for 45 to 60 minutes, but check earlier at 35 minutes. Cook until golden and the inside sounds hollow when knocked on the base. (Note: If you are baking in a tin, tap on the top of the loaf; you can do this even for a stand-alone loaf.)
With dinner rolls, divide the dough as required (again, no need to shape much). Bake in oven for 30 to 40 minutes, but check earlier at 25 minutes. Cook until golden and they sound hollow inside.
The recipe based on 500g flour makes one 850g loaf, or half a dozen dinner rolls.
Equipment: Large mixing bowl, baking paper, baking tray.
Difficulty: Not difficult (2/5), two lots of five minutes of preparation, several hours or overnight to allow the dough to rise, 30 to 60 minutes cooking.
Serve: Serve hot or warm. For leftover bread, reheat gently in the microwave or toast.
Variations and Notes:
We have experimented with the base method, with excellent results.
Check back to this post from time to time to see if any more variations or suggestions have been added. Some variations already tried or still to be tried are:
- Sprinkle with different seeds, or polenta, or … (Comments and photos below.)
- Make a 500g flour loaf in a tin (750ml to 1 litre capacity). (Comments and photos below.)
- Make baguettes. (Comments and photos below.)
- Add grains and seeds to the dry ingredients. (Comments and photos below.)
- Use wholemeal flour (or a mix of plain and wholemeal) using the same method. (Comments and photos below.)
- Try the method on hot cross buns or similar.
- Try and get a sourdough effect somehow.
- (Update August 2020: During the coronavirus pandemic there have been many useful posts about how to make sourdough bread; easily found with a search of the Internet.)
Baking smaller loaves or rolls:
Using 1kg flour makes a lot of bread; 500g flour – our preference – will make enough for some days. For even smaller amounts, you could make the dry mixture for 1kg then separate into bags of equal weight, remembering how much water needs to be added. For example, you could make four bags of about 250g and put aside in the pantry until needed. To each of these you would add 240 (237.5) ml warm water.
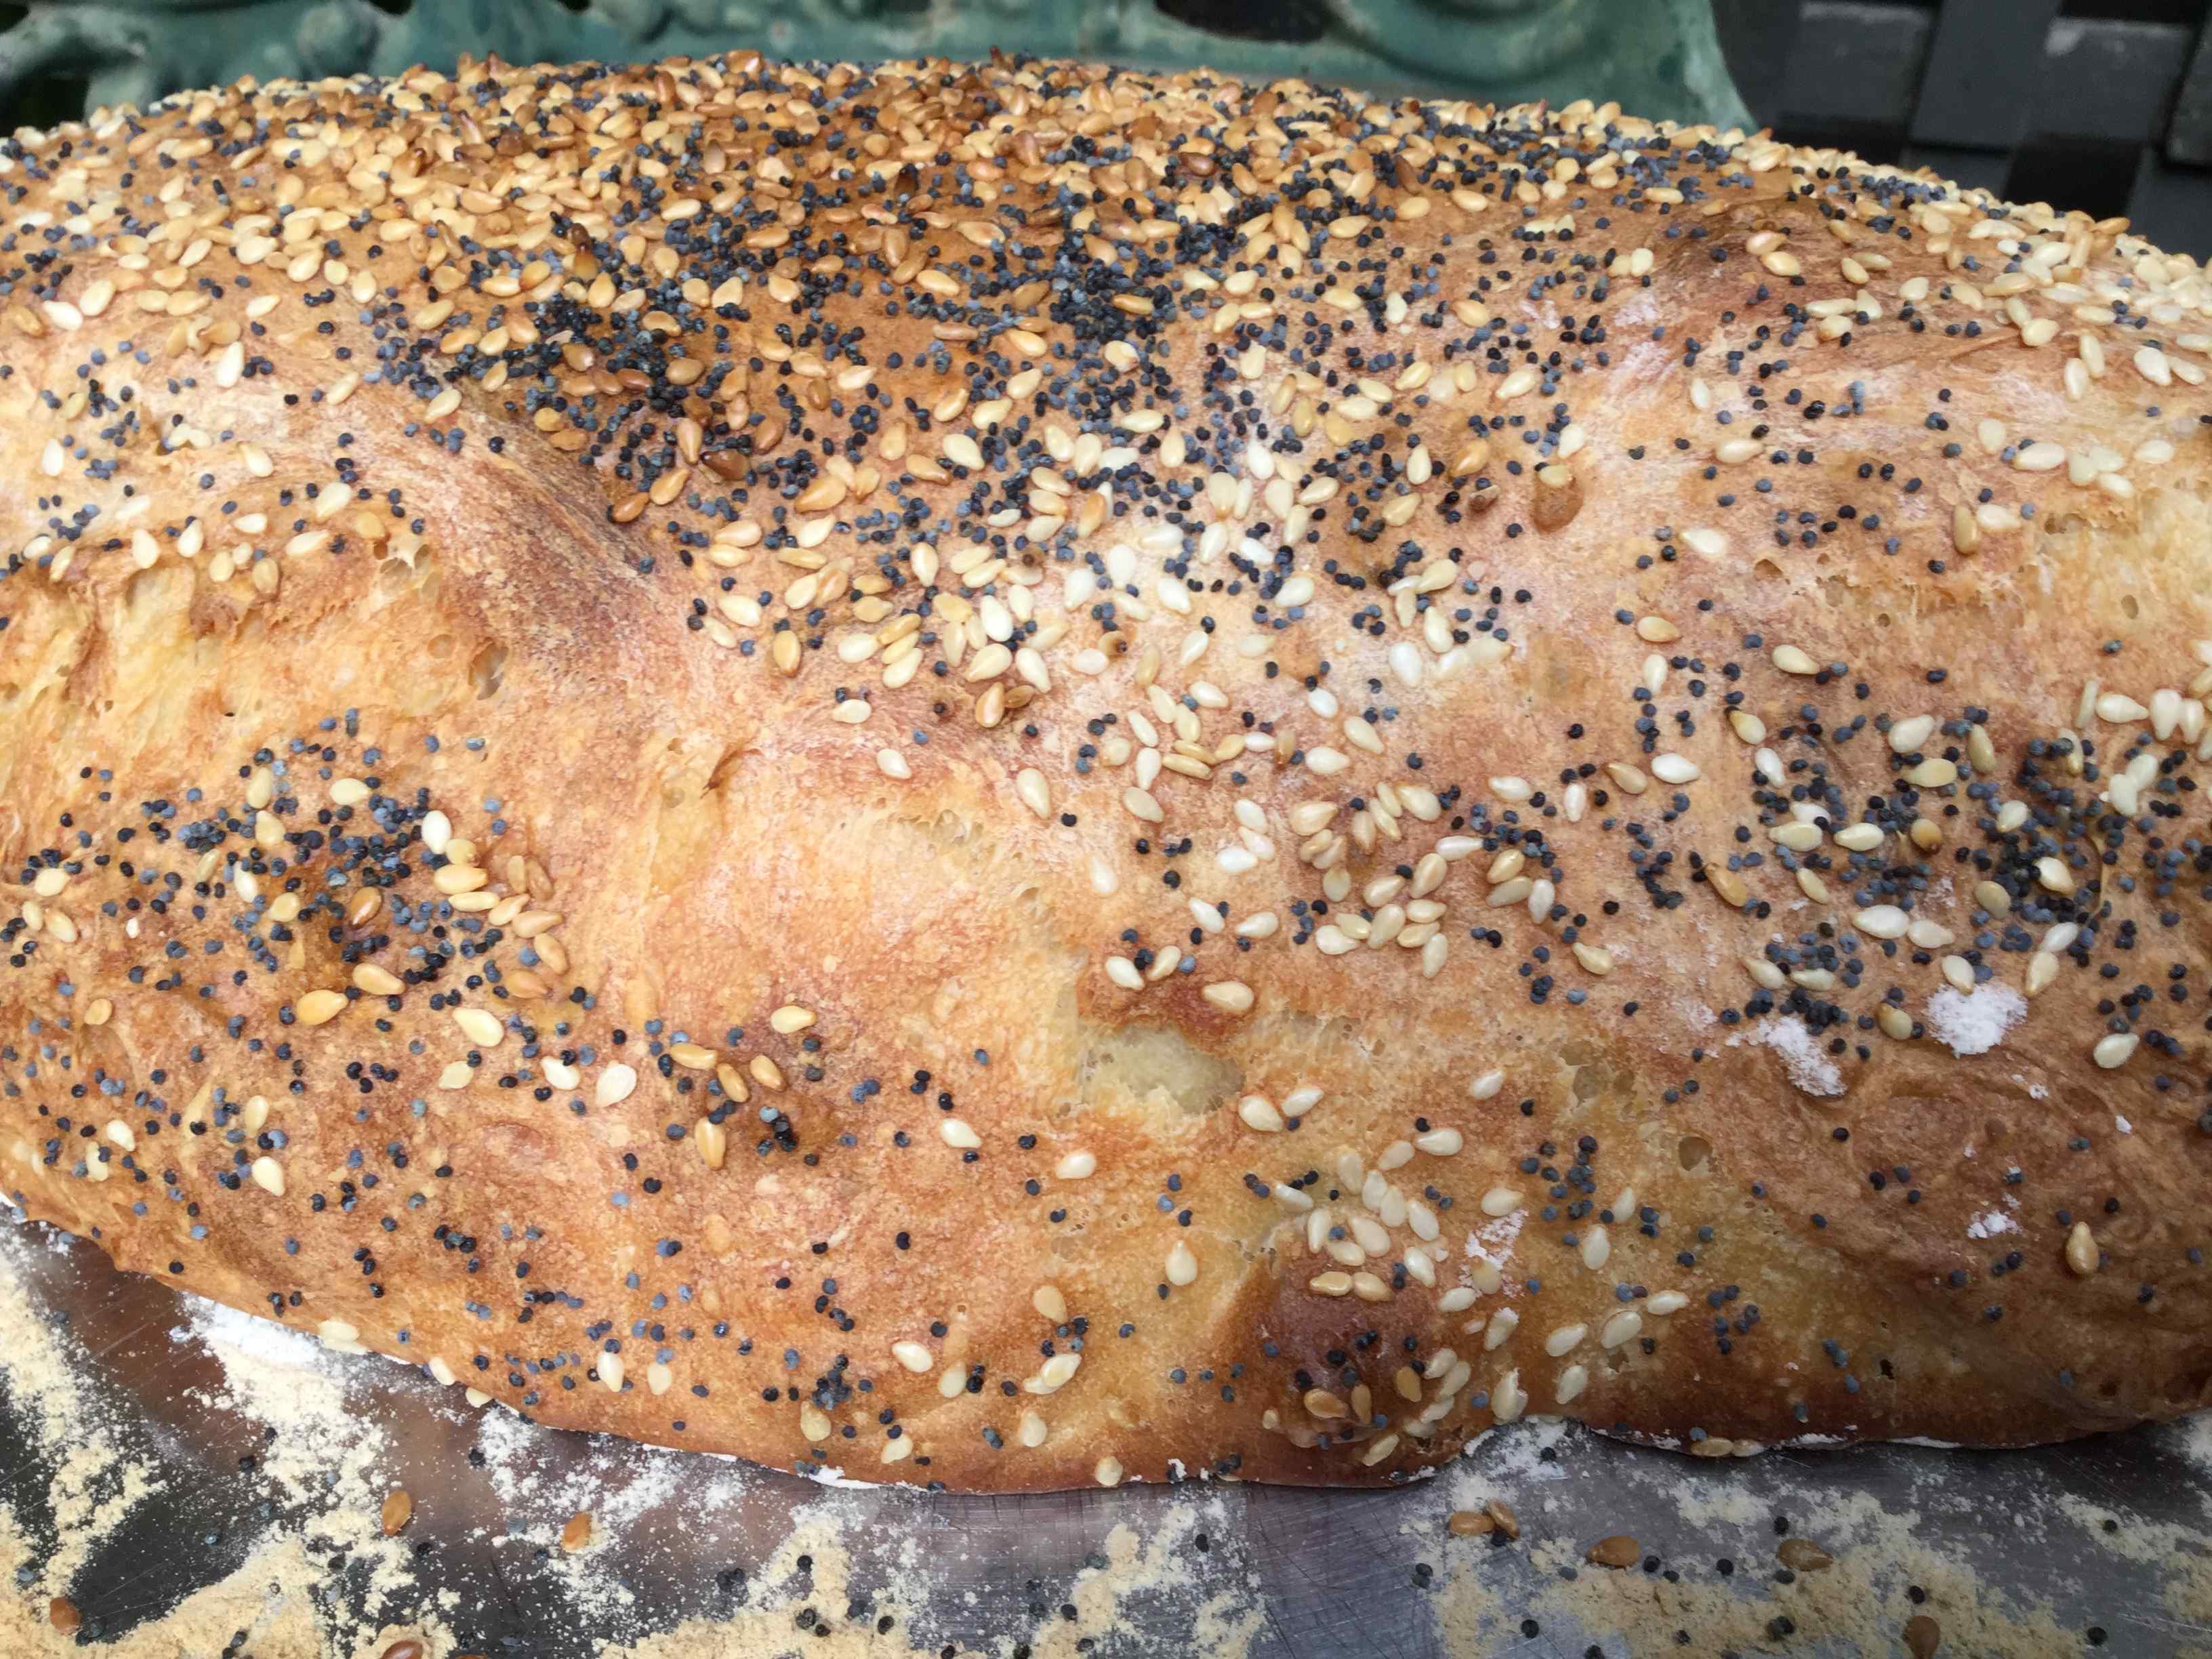
Sprinkled with seeds:
Once the dough is tipped out and ready to go into the oven, you will see the surface is quite moist. Without dusting with flour, sprinkle over some sesame and poppy seeds or similar. They will adhere beautifully during cooking. (Alternatively, if the surface is dry or floury, spray lightly with water.)

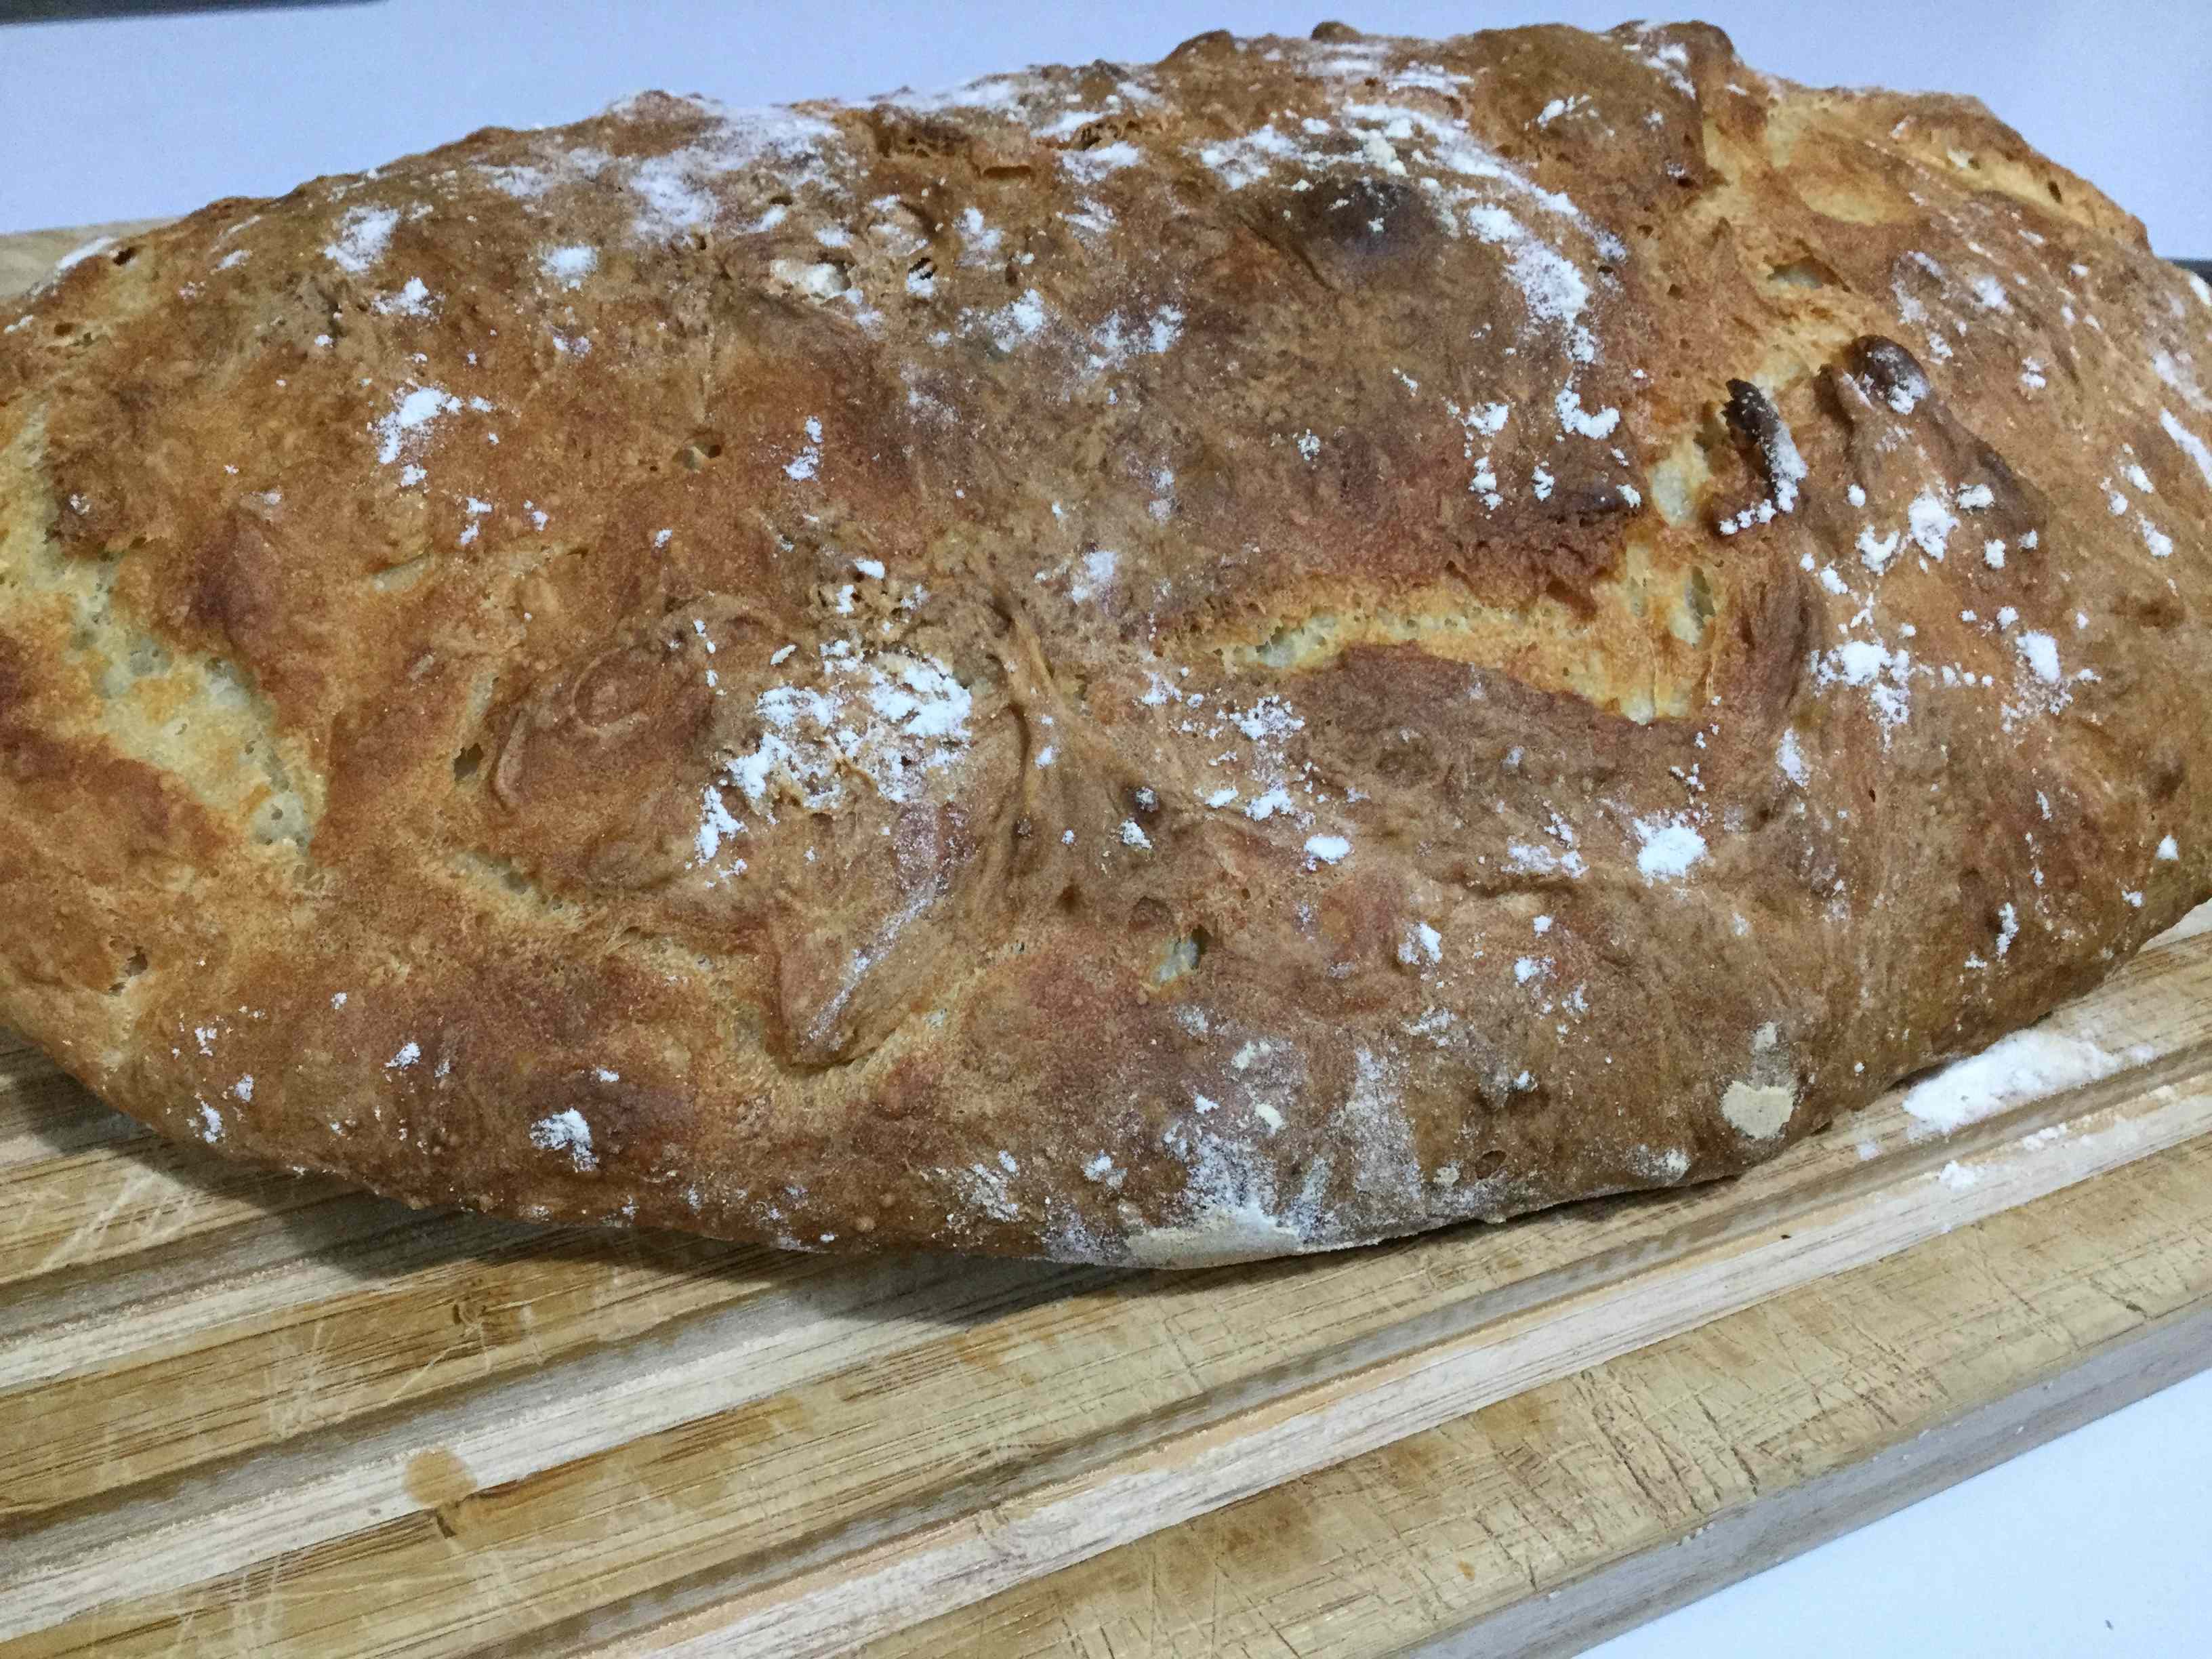
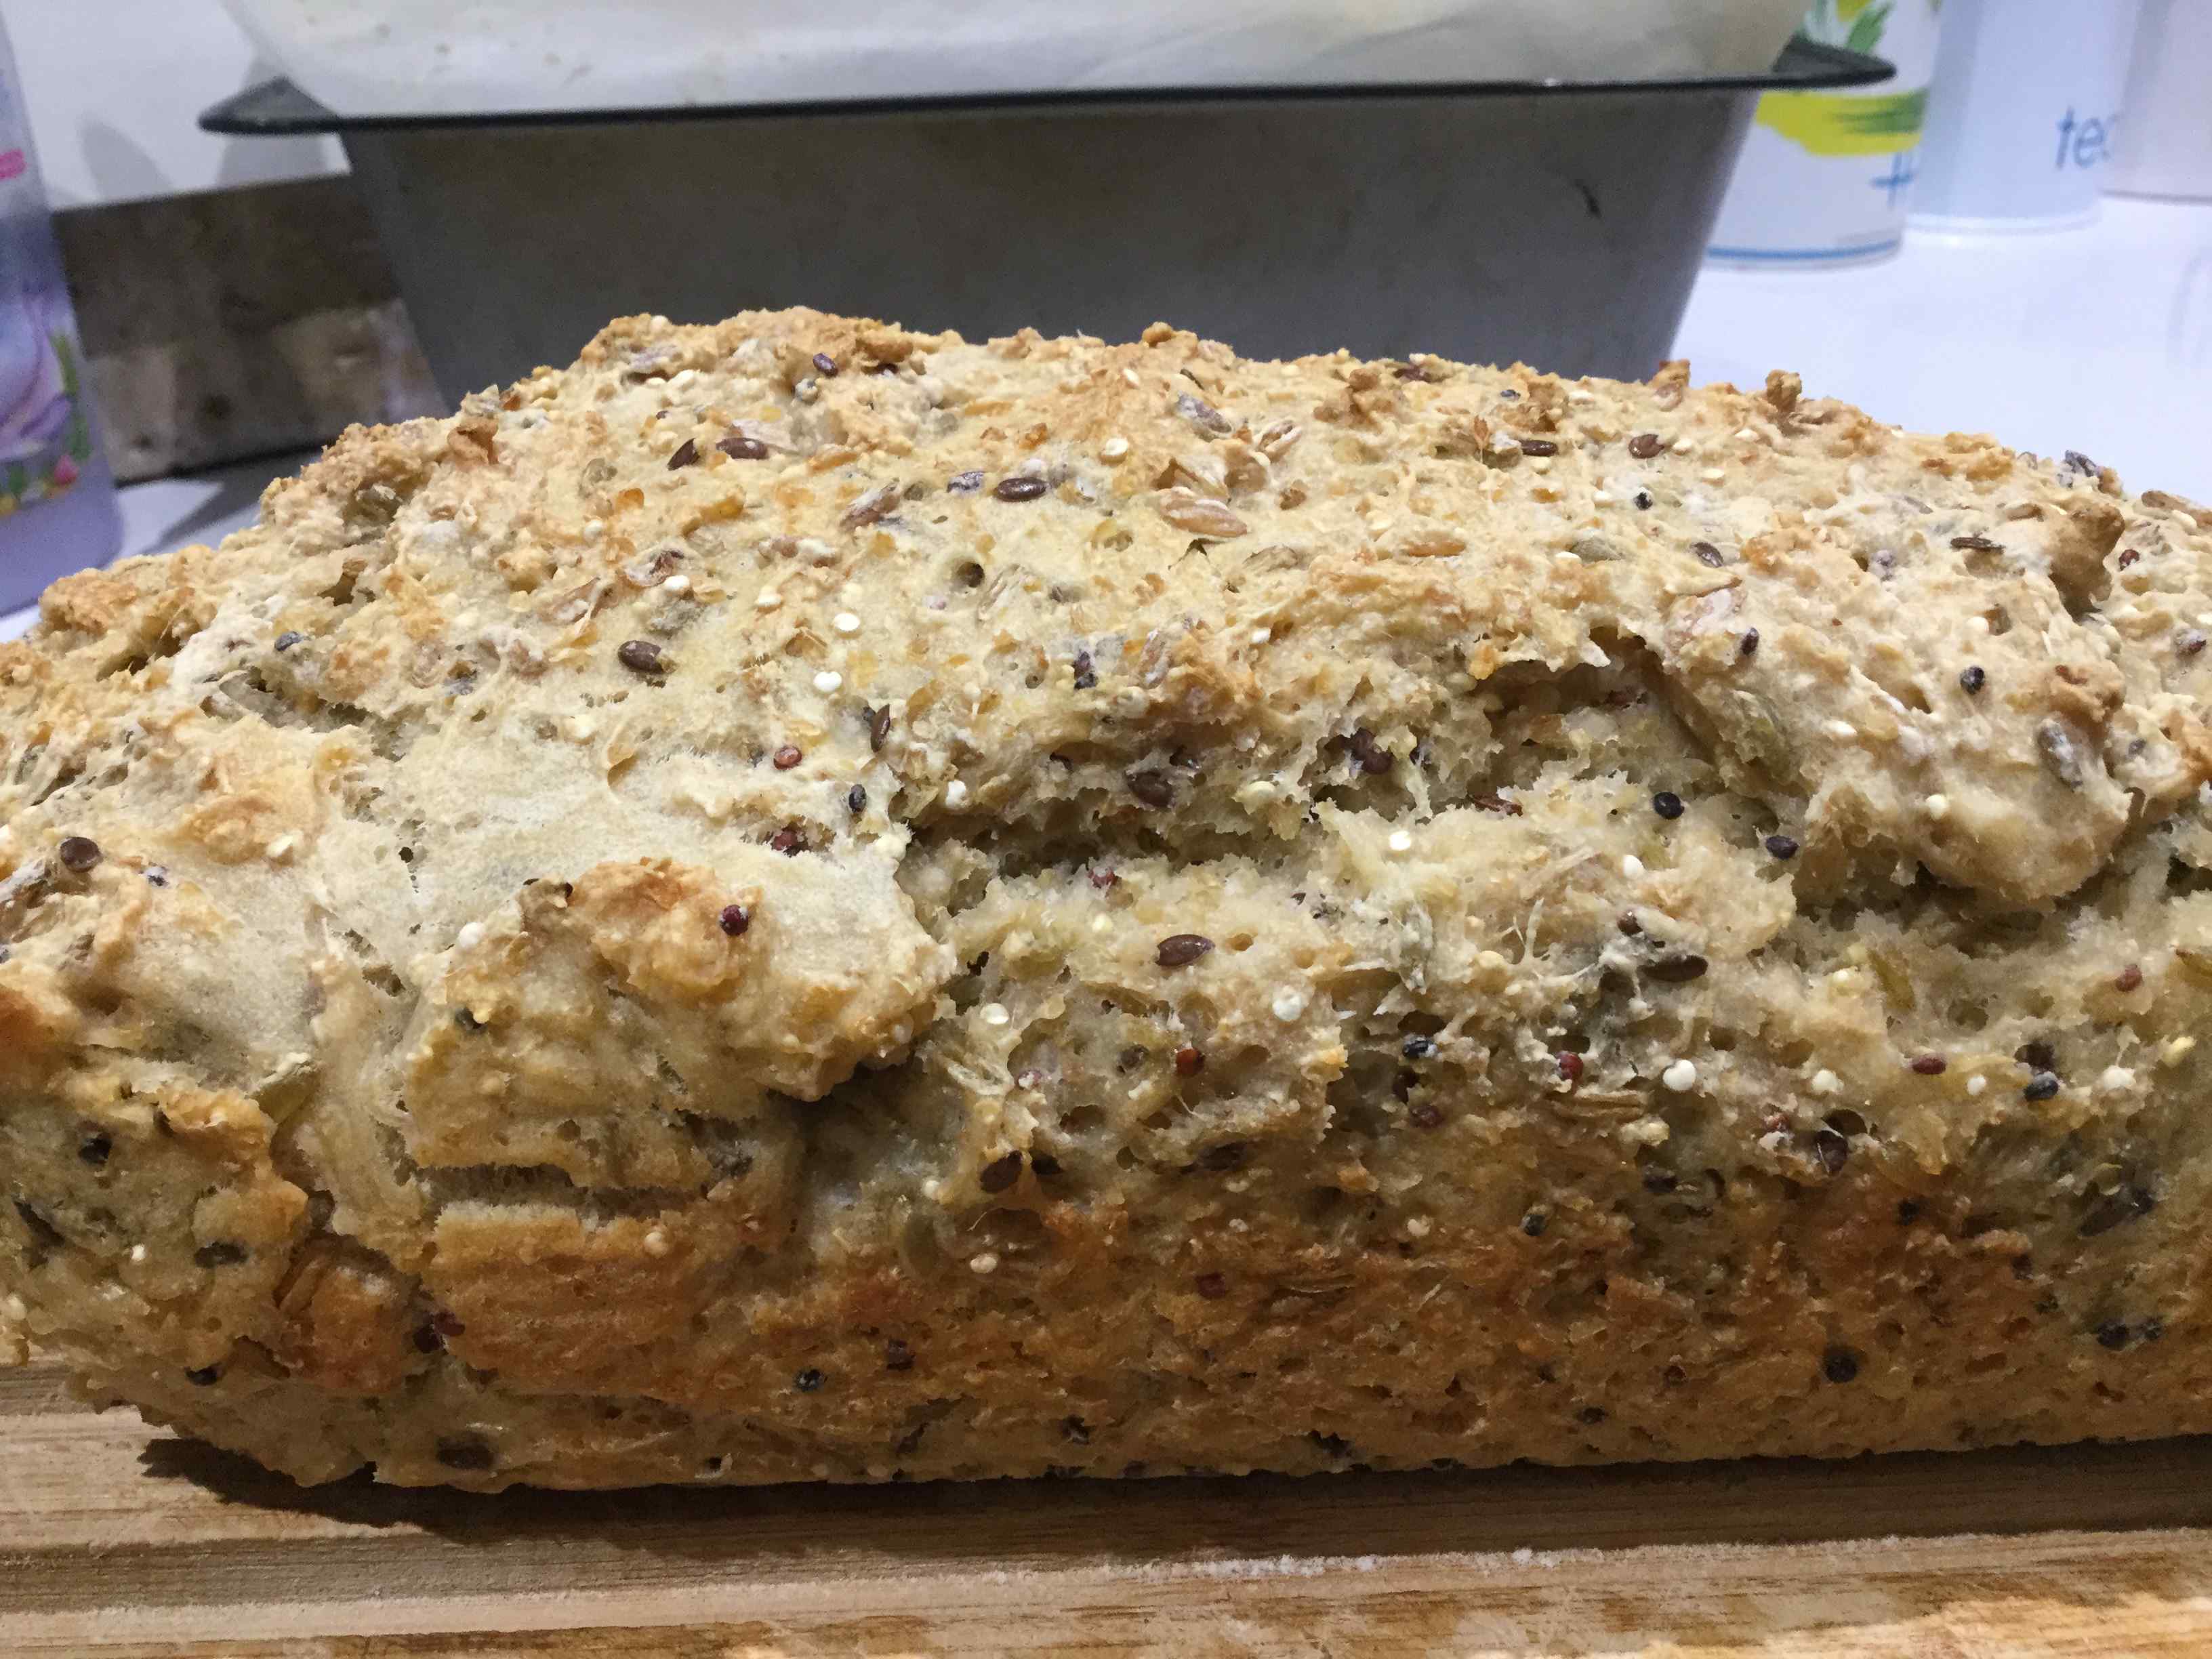
Baked in a loaf tin:
We refer to this in the main recipe above. Line a loaf tin of 750ml to 1000ml capacity with baking paper, or use a bare tin (sprayed with oil if desired). If you want to have seeds on the outside of the loaf, spray the baking paper or tin with an oil to help the seeds stick, then sprinkle inside with seeds or polenta. Simply tip the dough into the tin. Sprinkle more over the top, and bake as per normal. A tin or similar does produce a better shape.


Two of our friends decided to make a loaf each. One baked it ‘as is’ on baking paper, the other used a tin. Here are their results.

Baking utensils:
The bread holds its shape if cooked in a container. Try a loaf tin, Dutch oven or baguette baker.

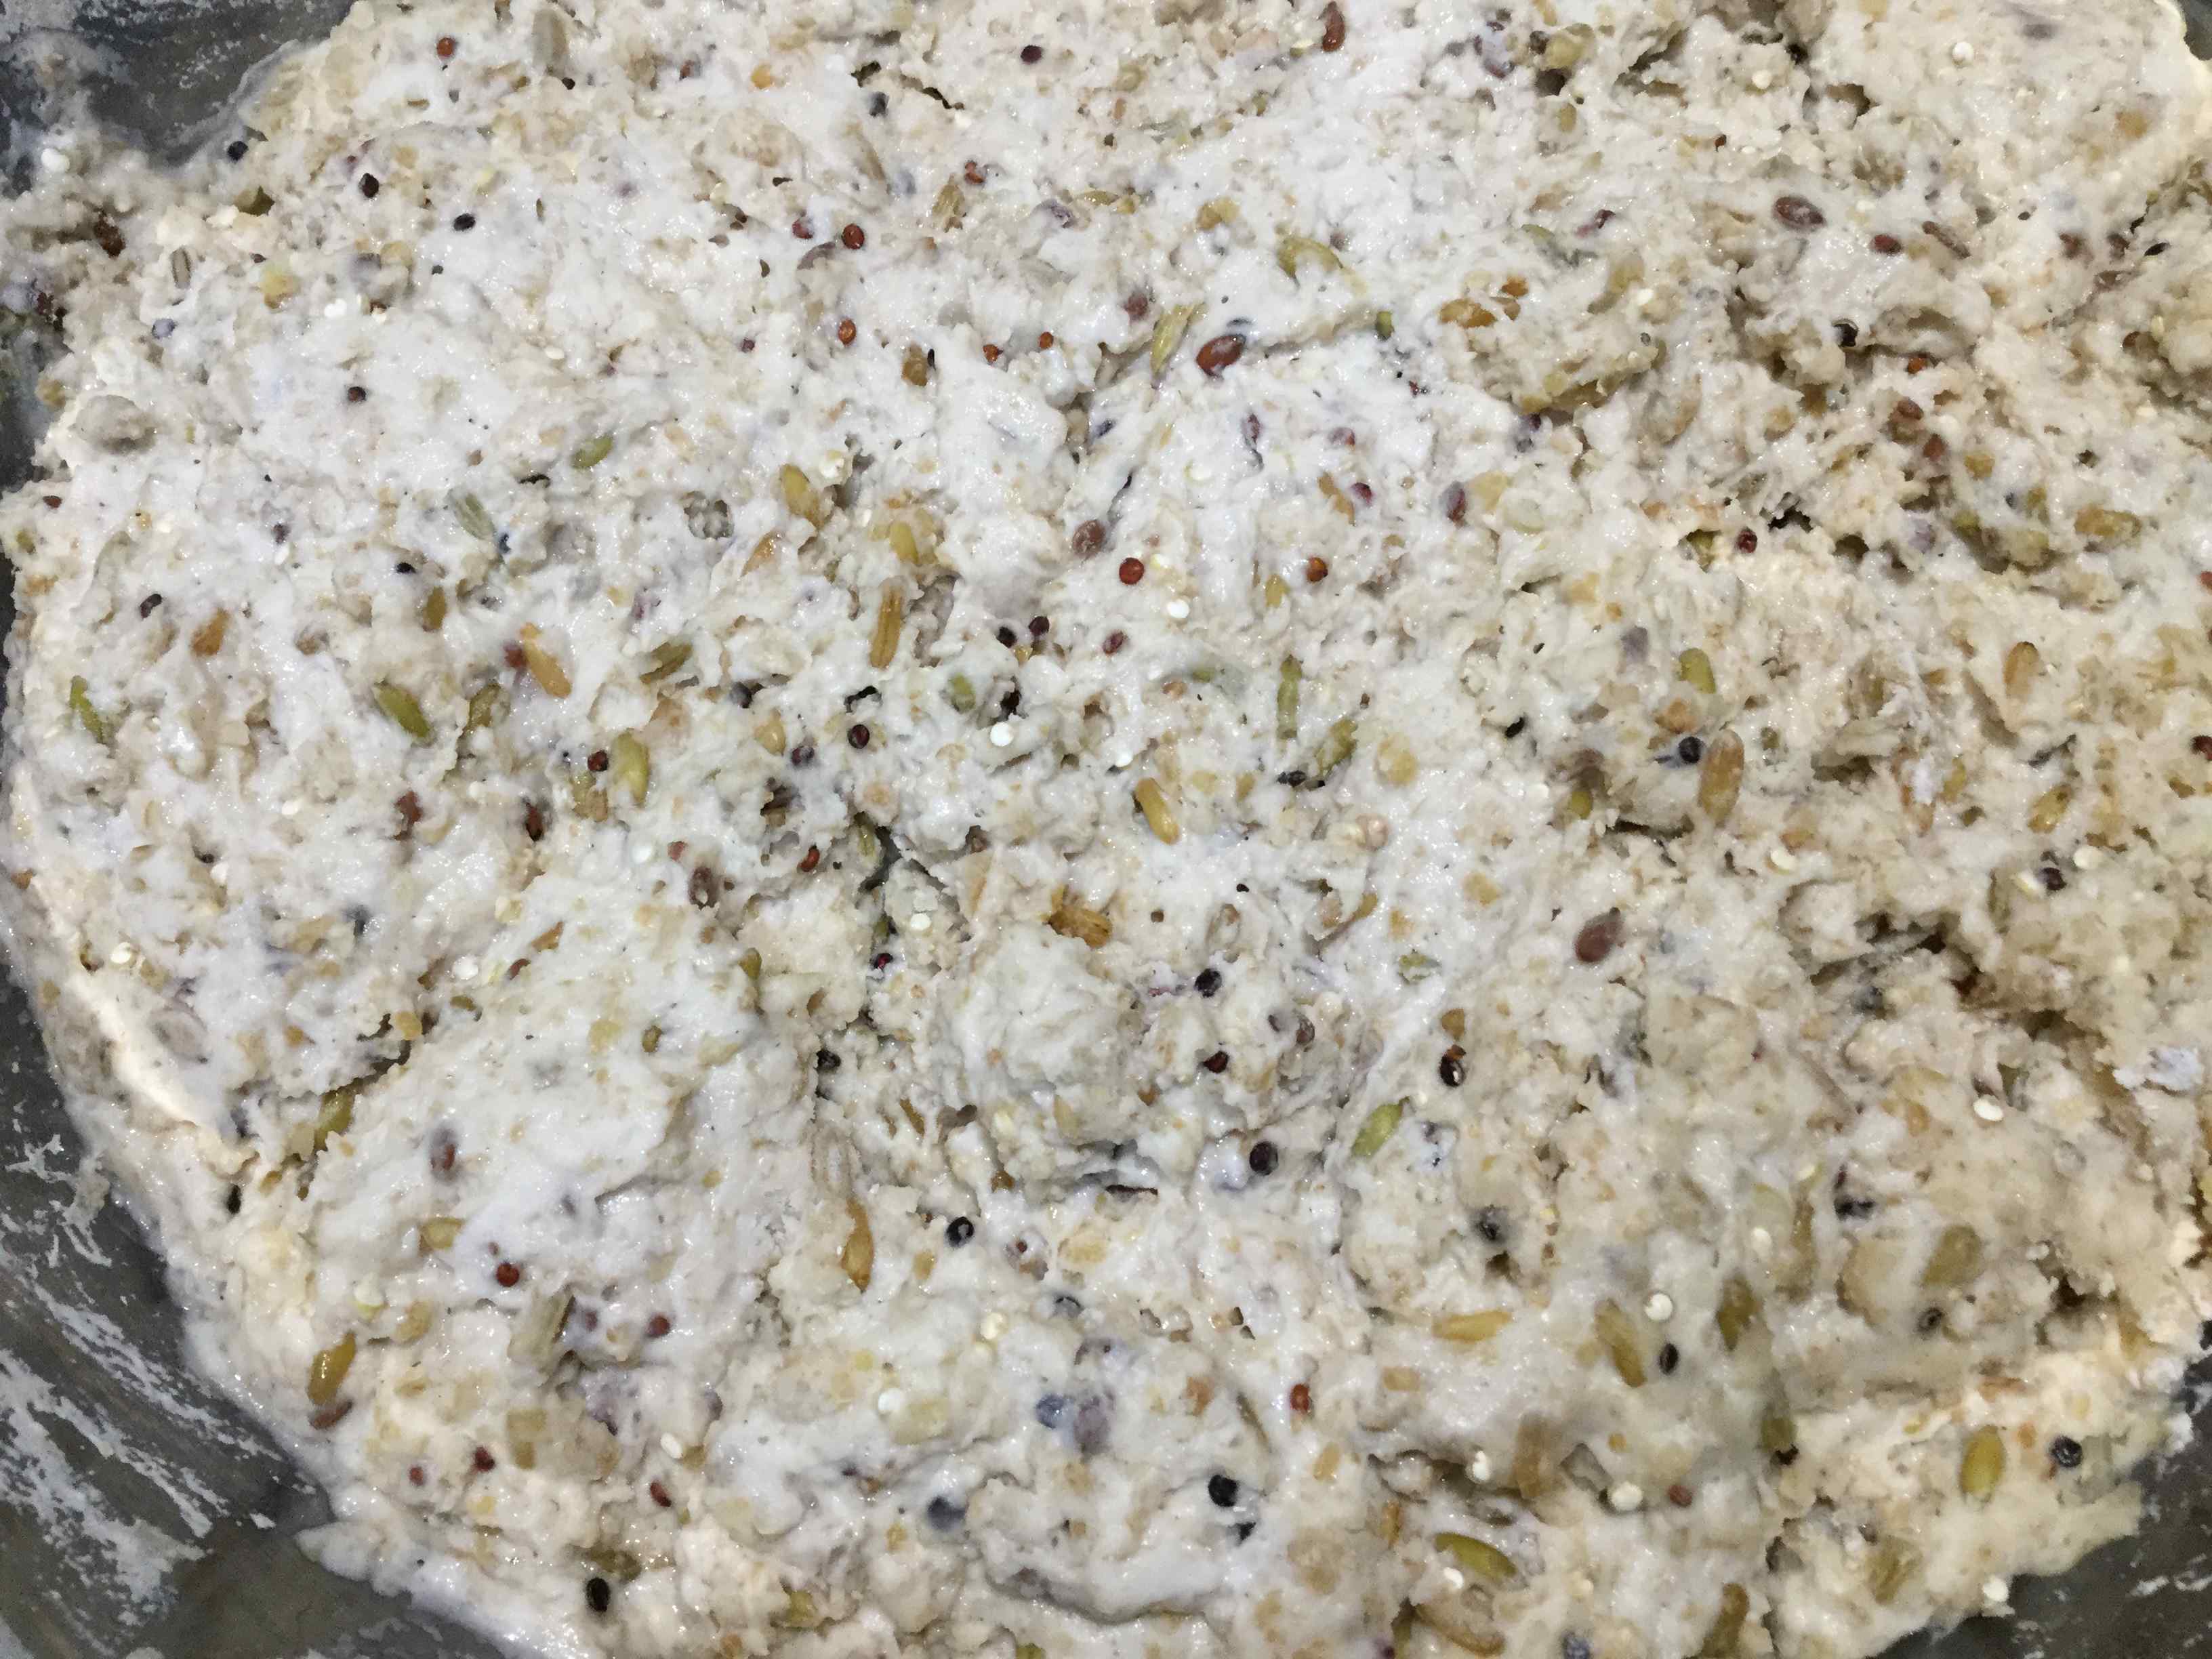
Wholemeal grain:
We decided to “throw the kitchen sink” at this method. We used a mixture of flours and grains and seeds as follows – they covered the range of ingredients we had on hand that we thought could be interesting. The wholemeal flour was ‘normal’ and not specifically bread/strong flour.
The feedback from those who tasted it was “fantastic”. It could have been even better: we could possibly have used more salt, and more yeast to help with the rise. And we could have cooked it for another five minutes, as our loaf was quite moist. Our photos are based on “cook and shoot” – see the results of this loaf below.
However, the bread had a lovely chewy texture and was so yummy : fresh from the oven and spread with lovely butter; with vegemite, honey, jam, …; served with soup, cheese, …; terrific toasted over the next few days.
Following is what we used and what we did. You will see there is plenty of room for experimentation. Check the Internet for the suitability of various flours, seeds and grains for baking. Note that some seeds need soaking.
Ingredients:
- 300g white bread flour
- 100g wholemeal flour
- 100g spelt flour
- 7g yeast
- 1/2 to 3/4 tbsps salt
- 1/3 cup cracked wheat (fine grain), soaked in cold water, just covered, for up to hour
- 1/3 cup bourghul (bulgar), soaked in cold water, just covered, for up to hour
- 1/3 cup freekah, soaked in hot water, just covered, for up to an hour
- 1/3 cup coloured quinoa, dry
- 1/4 cup linseed, dry
- 475 ml lukewarm water
Method:
Drain the soaked seeds well, otherwise they will make the dough too wet.
Combine the first five dry ingredients. Add the seeds and grains and stir through the flour mixture.
Tip in the water and mix as per normal. Refrigerate to rise, maybe allowing longer than four hours because of the extra heaviness of the dough mixture.
When ready, bake as per normal as a free-standing loaf or in a tin (as in the photos).
Make sure it is cooked: it might sound OK when tapped, but if it is not over-browned, allow another five minutes.
The following three photos show the raw dough after proving in the fridge, cooked and removed from the loaf tin, and later sliced.

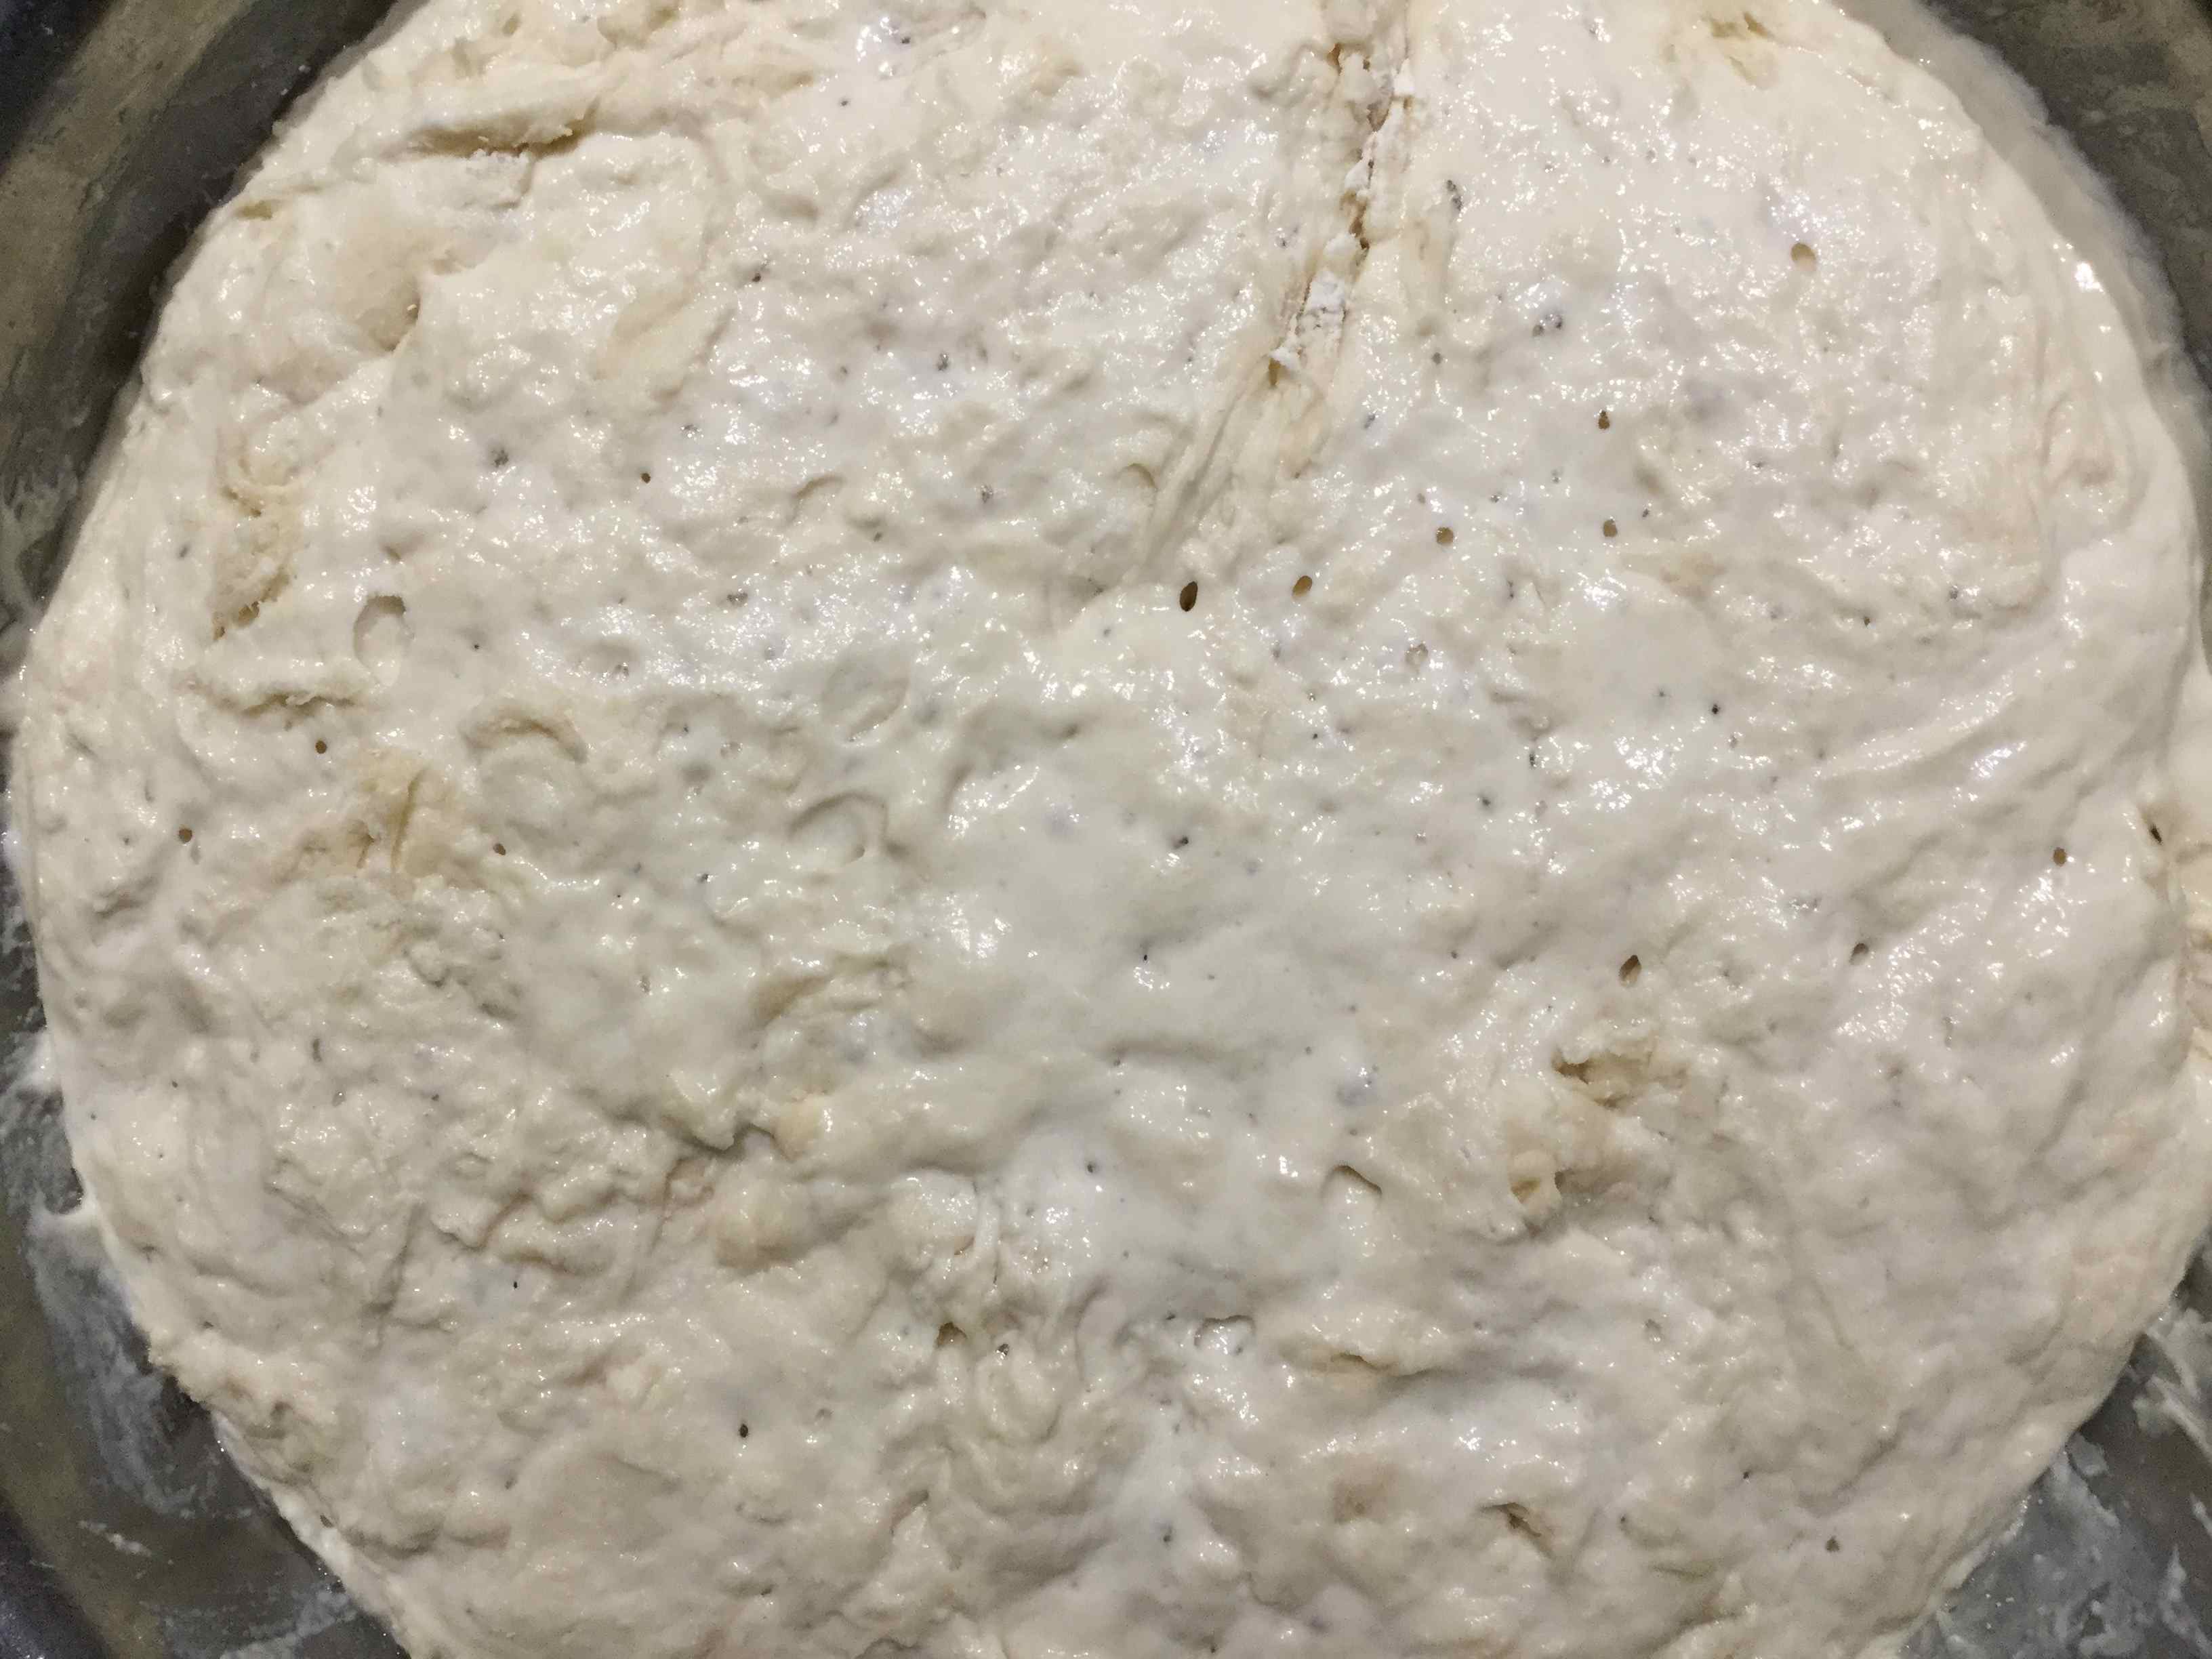
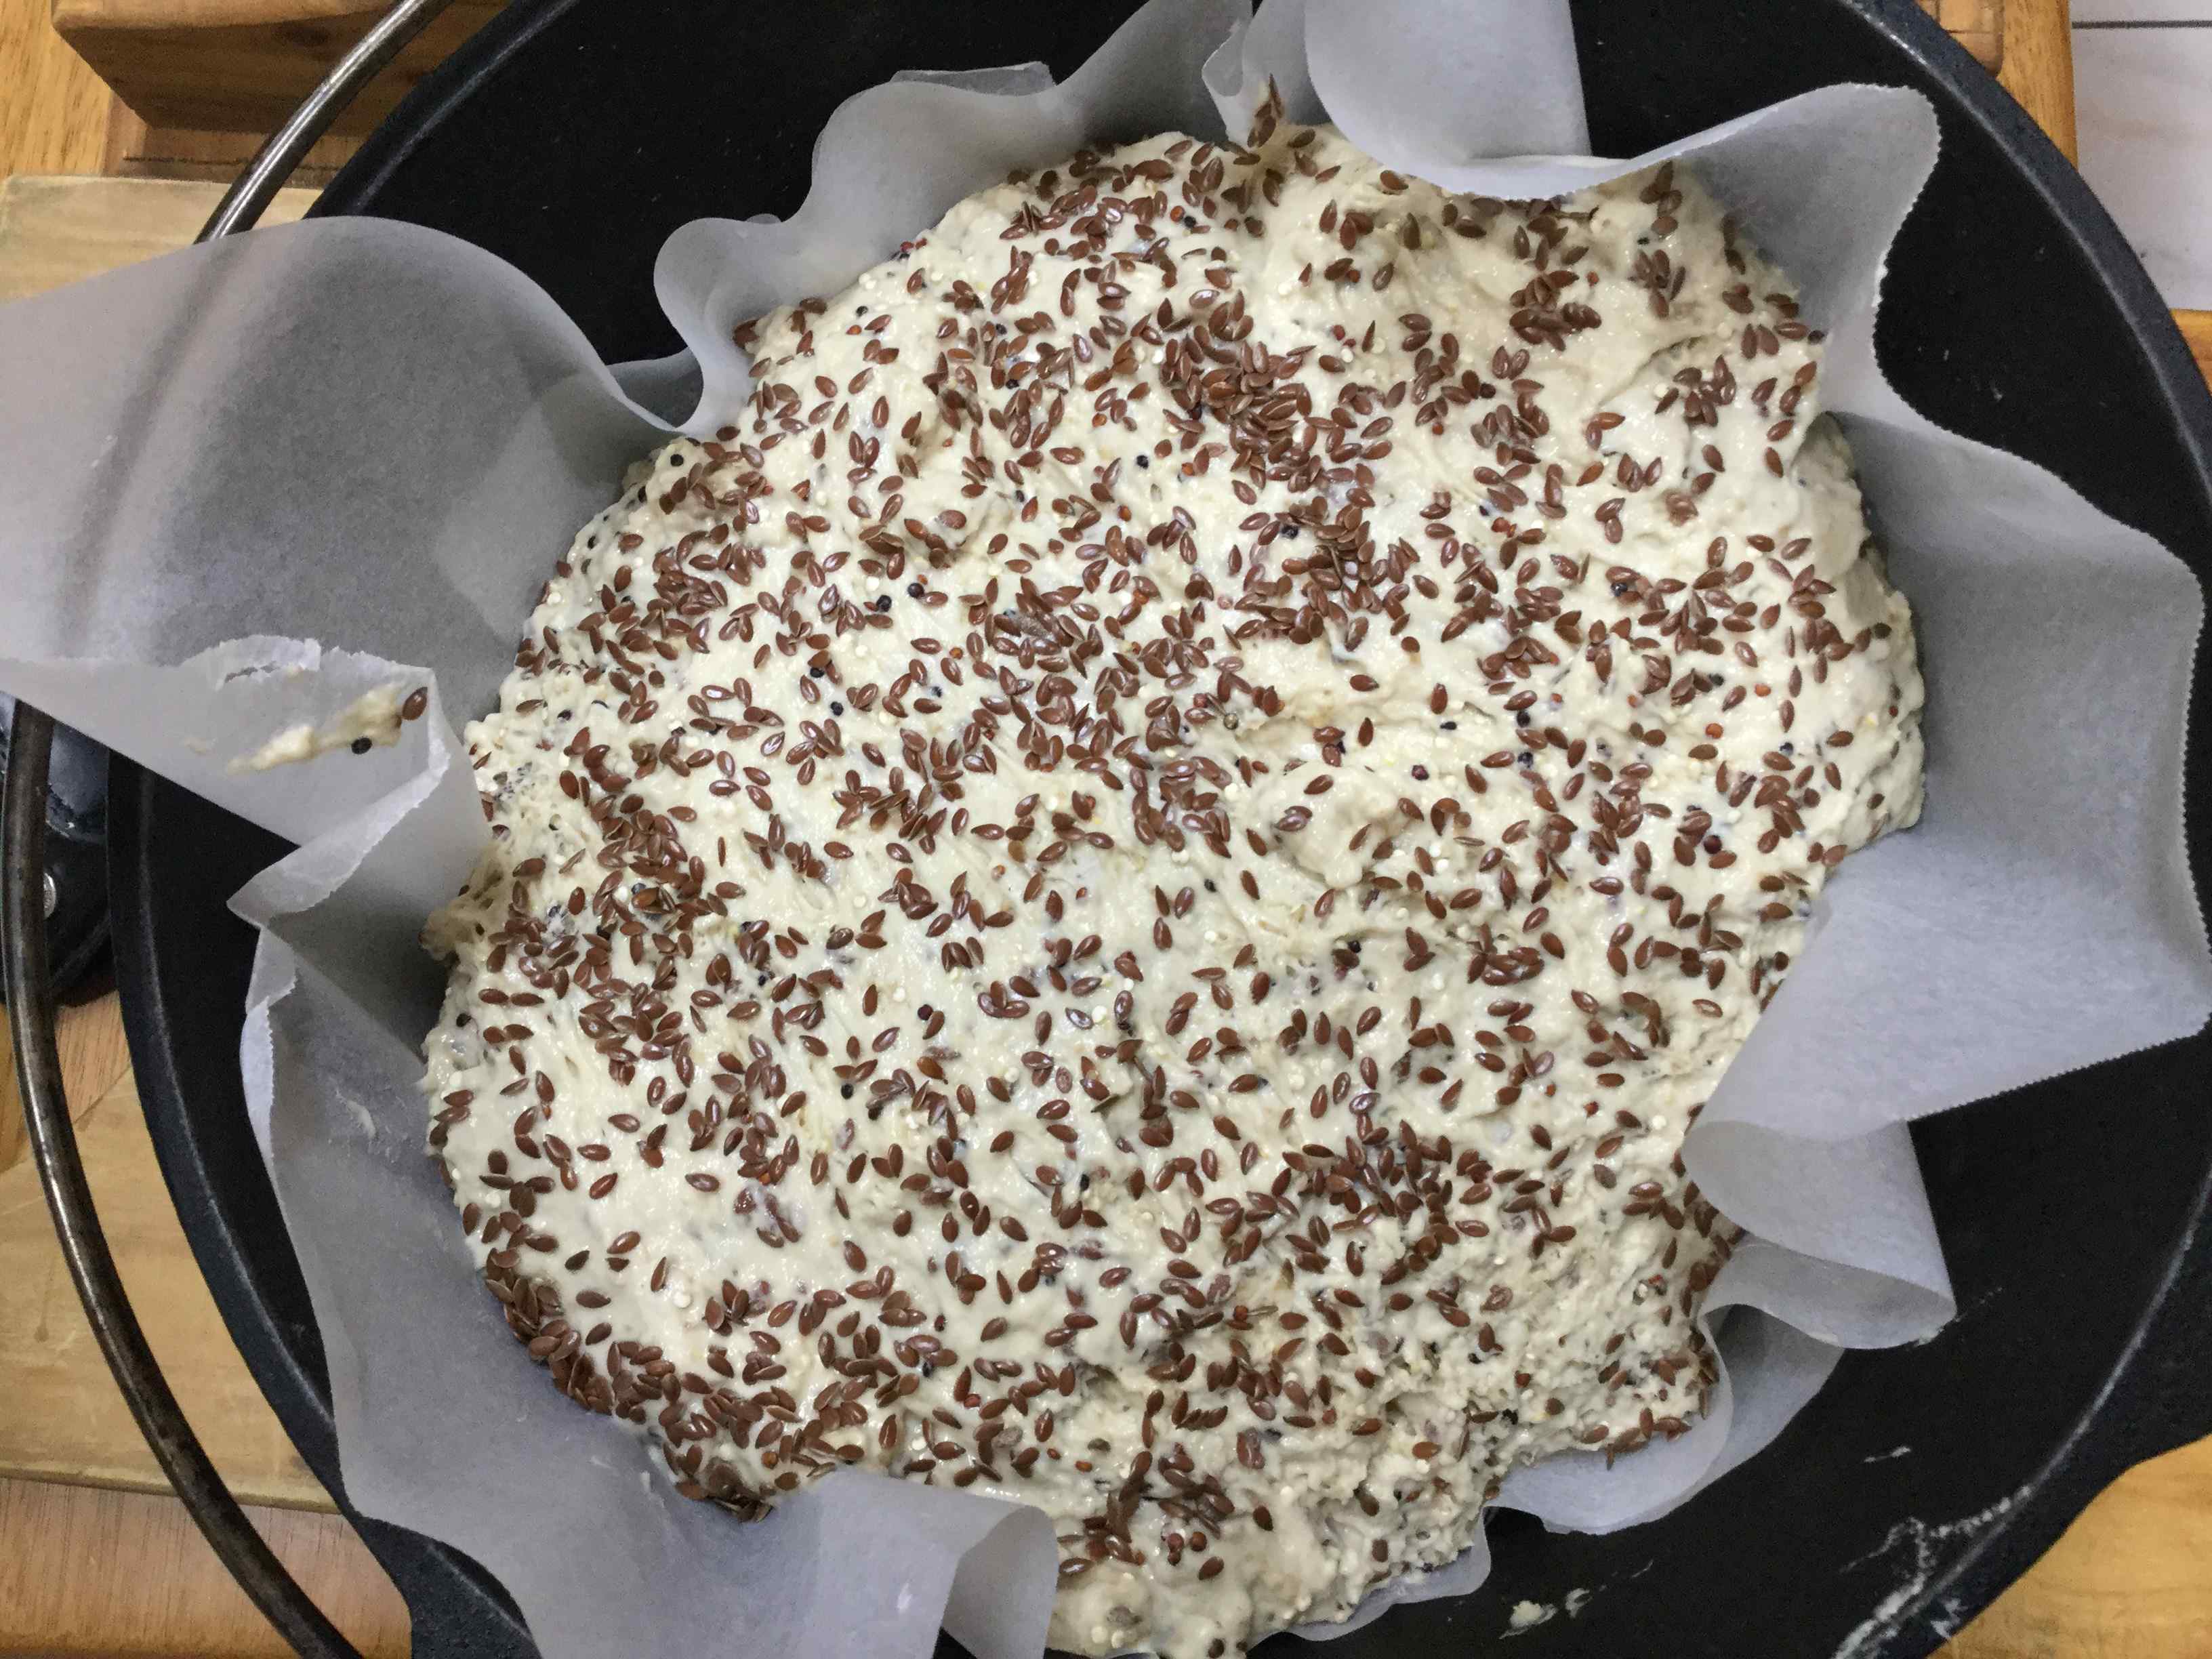
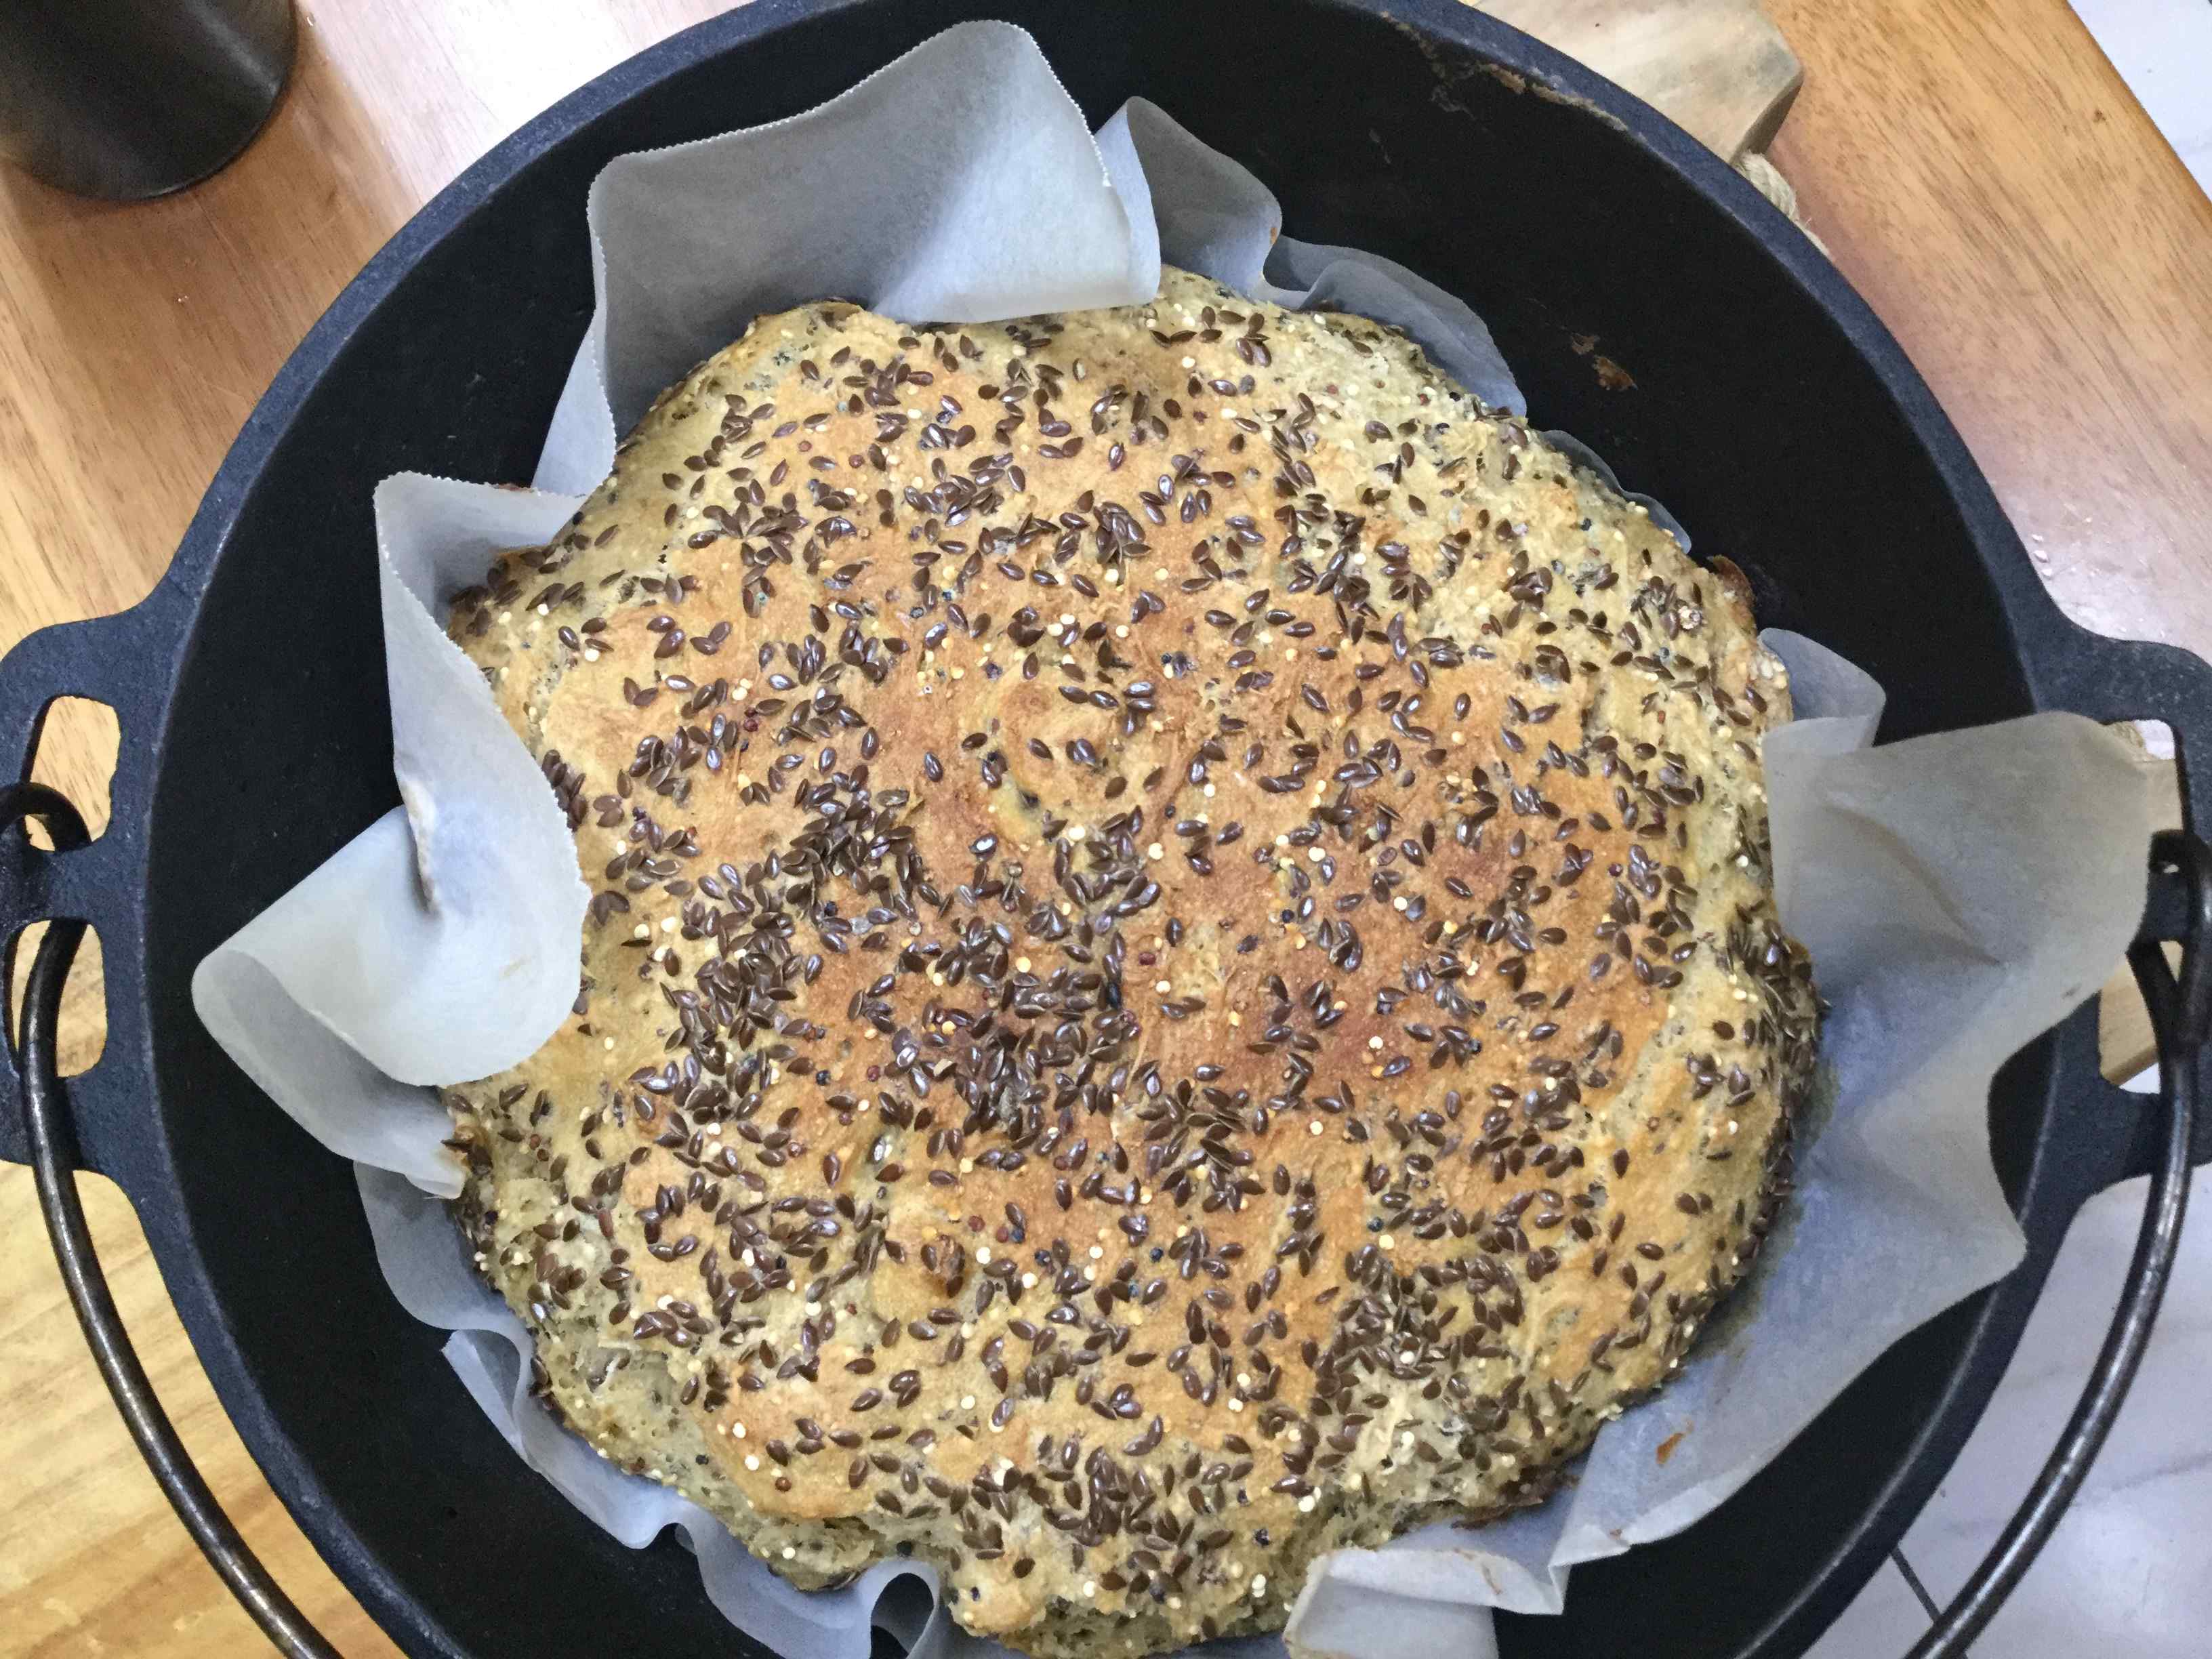
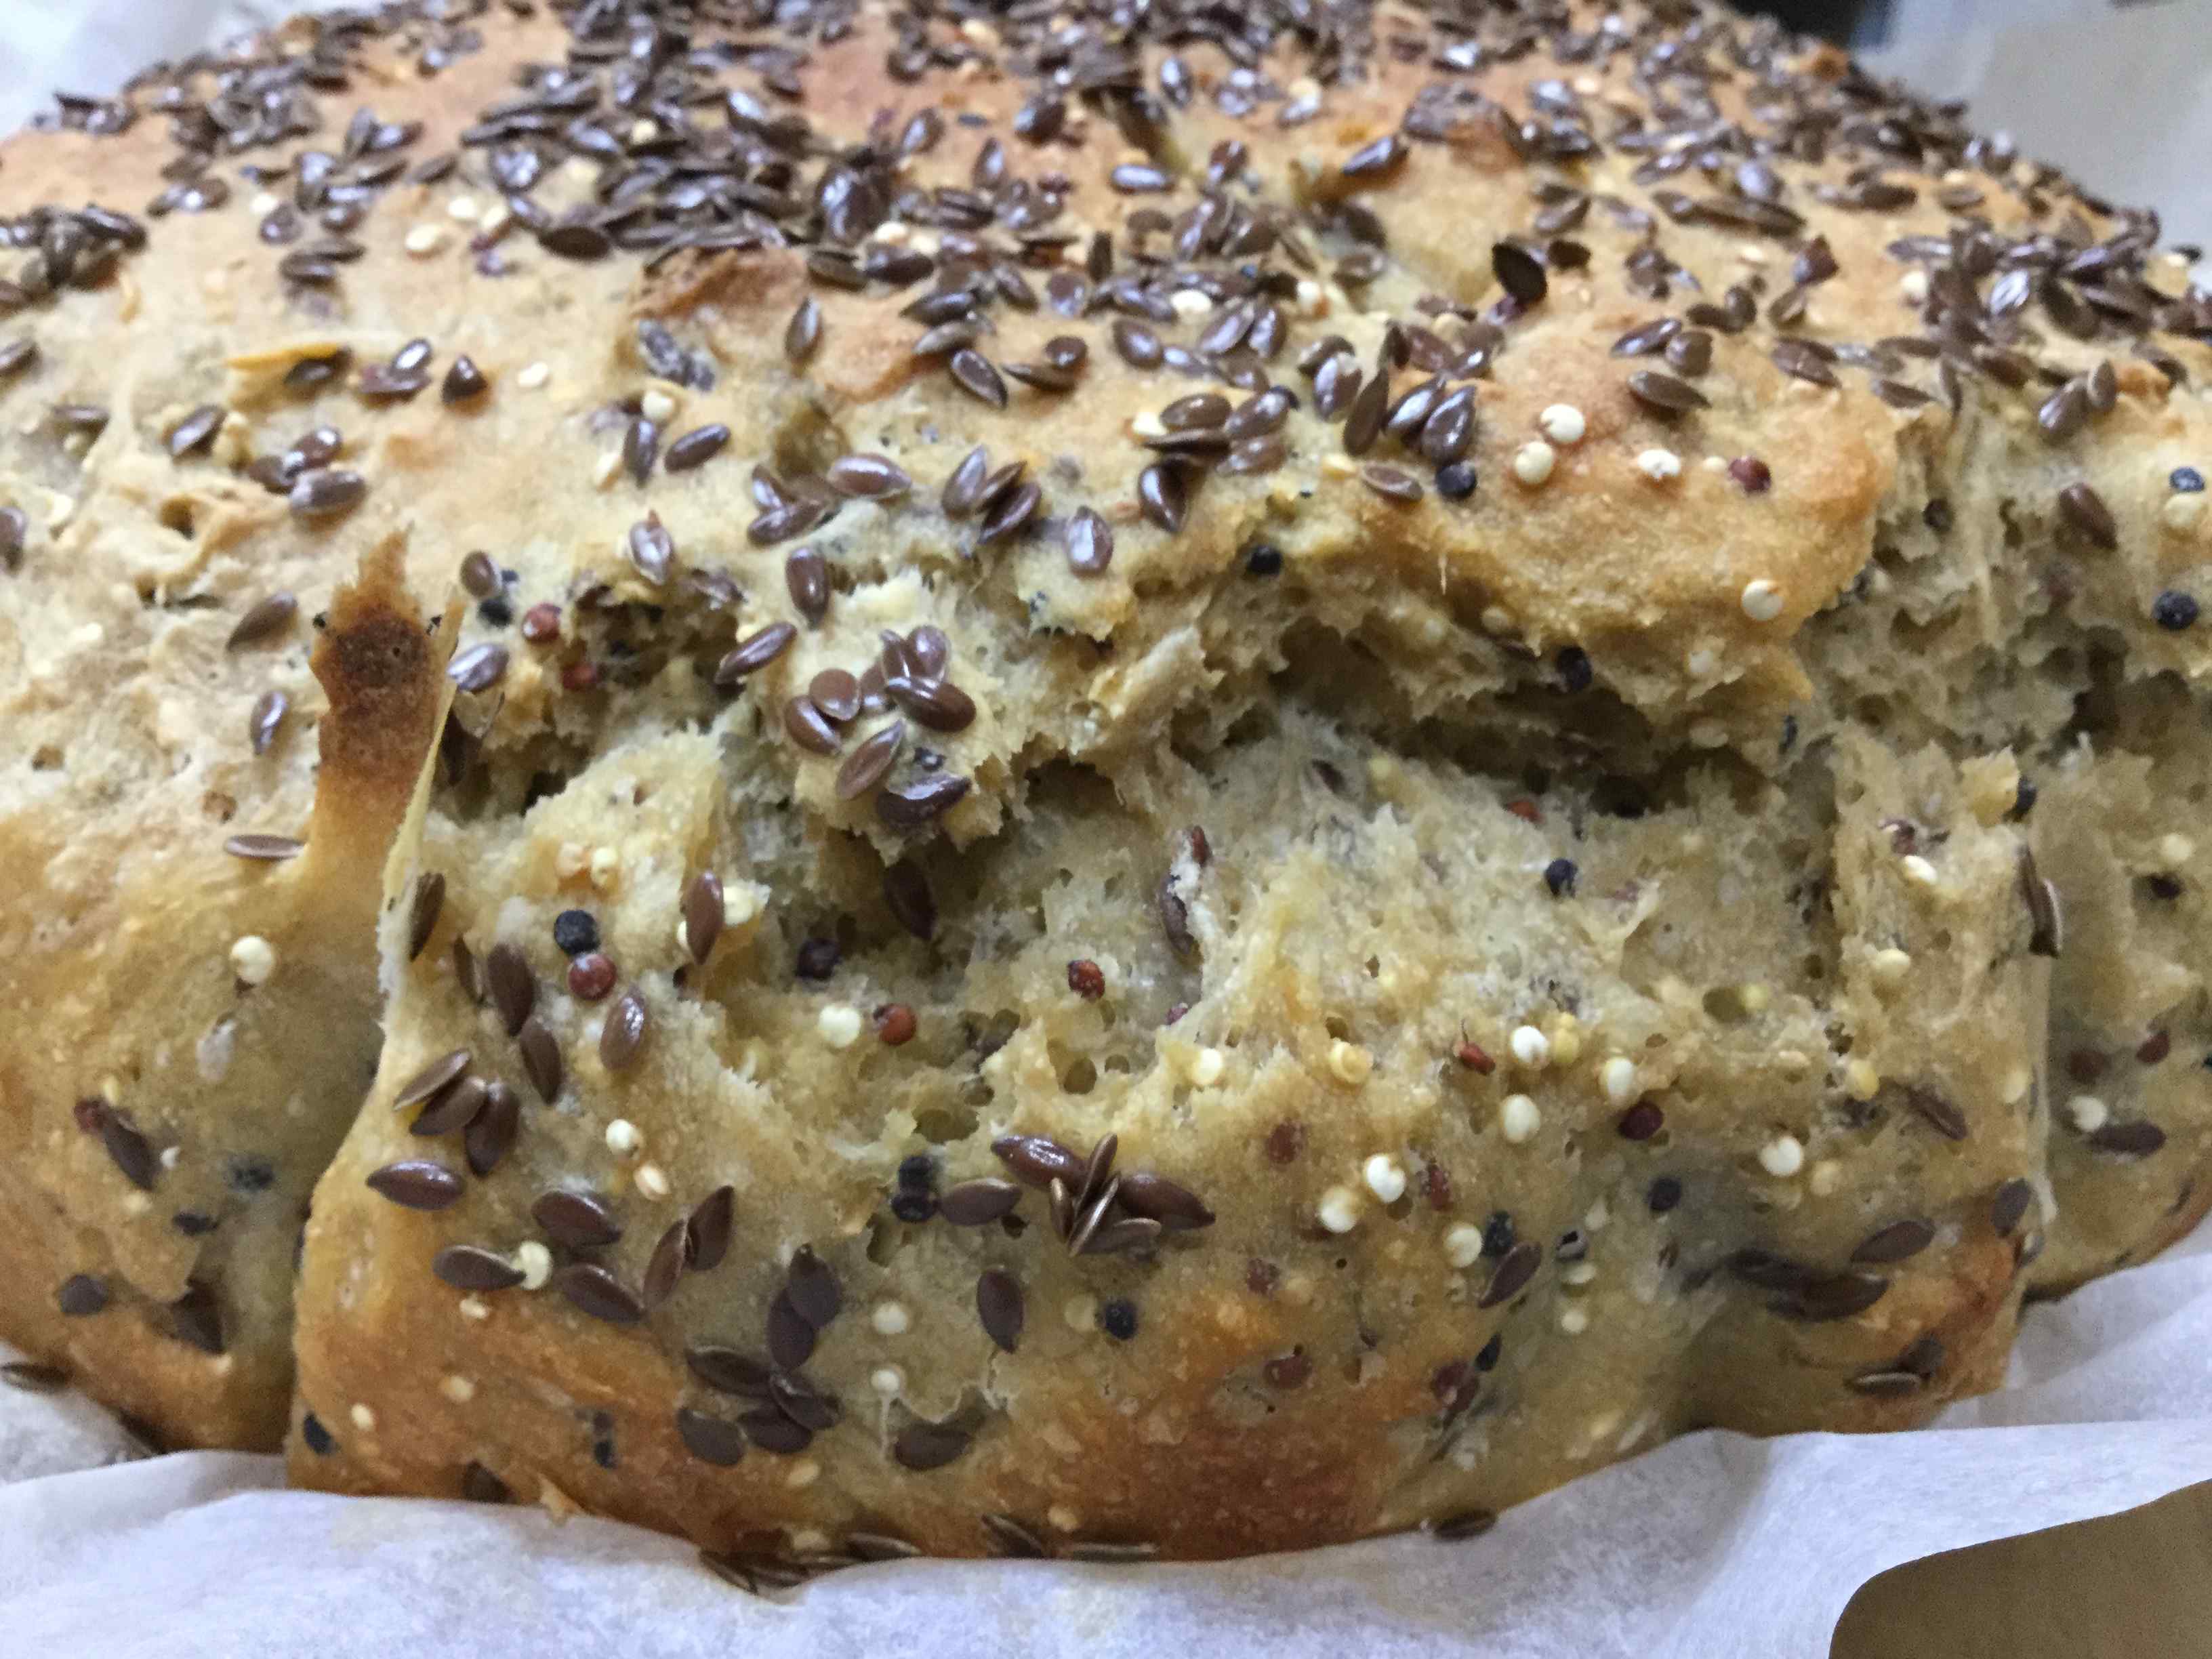
Cooked in a cast iron casserole:
One of the problems with the main recipe is that the loaf does not hold its shape. Here we made a dough with various dry seeds mixed into the dough, then tipped it into a lined cast iron dish (sometimes called a Dutch oven, see photo). If you don’t have a cast iron dish, use a suitable casserole dish. The various photos following the Dutch oven show the dough once mixed, then after rising, and then cooked.


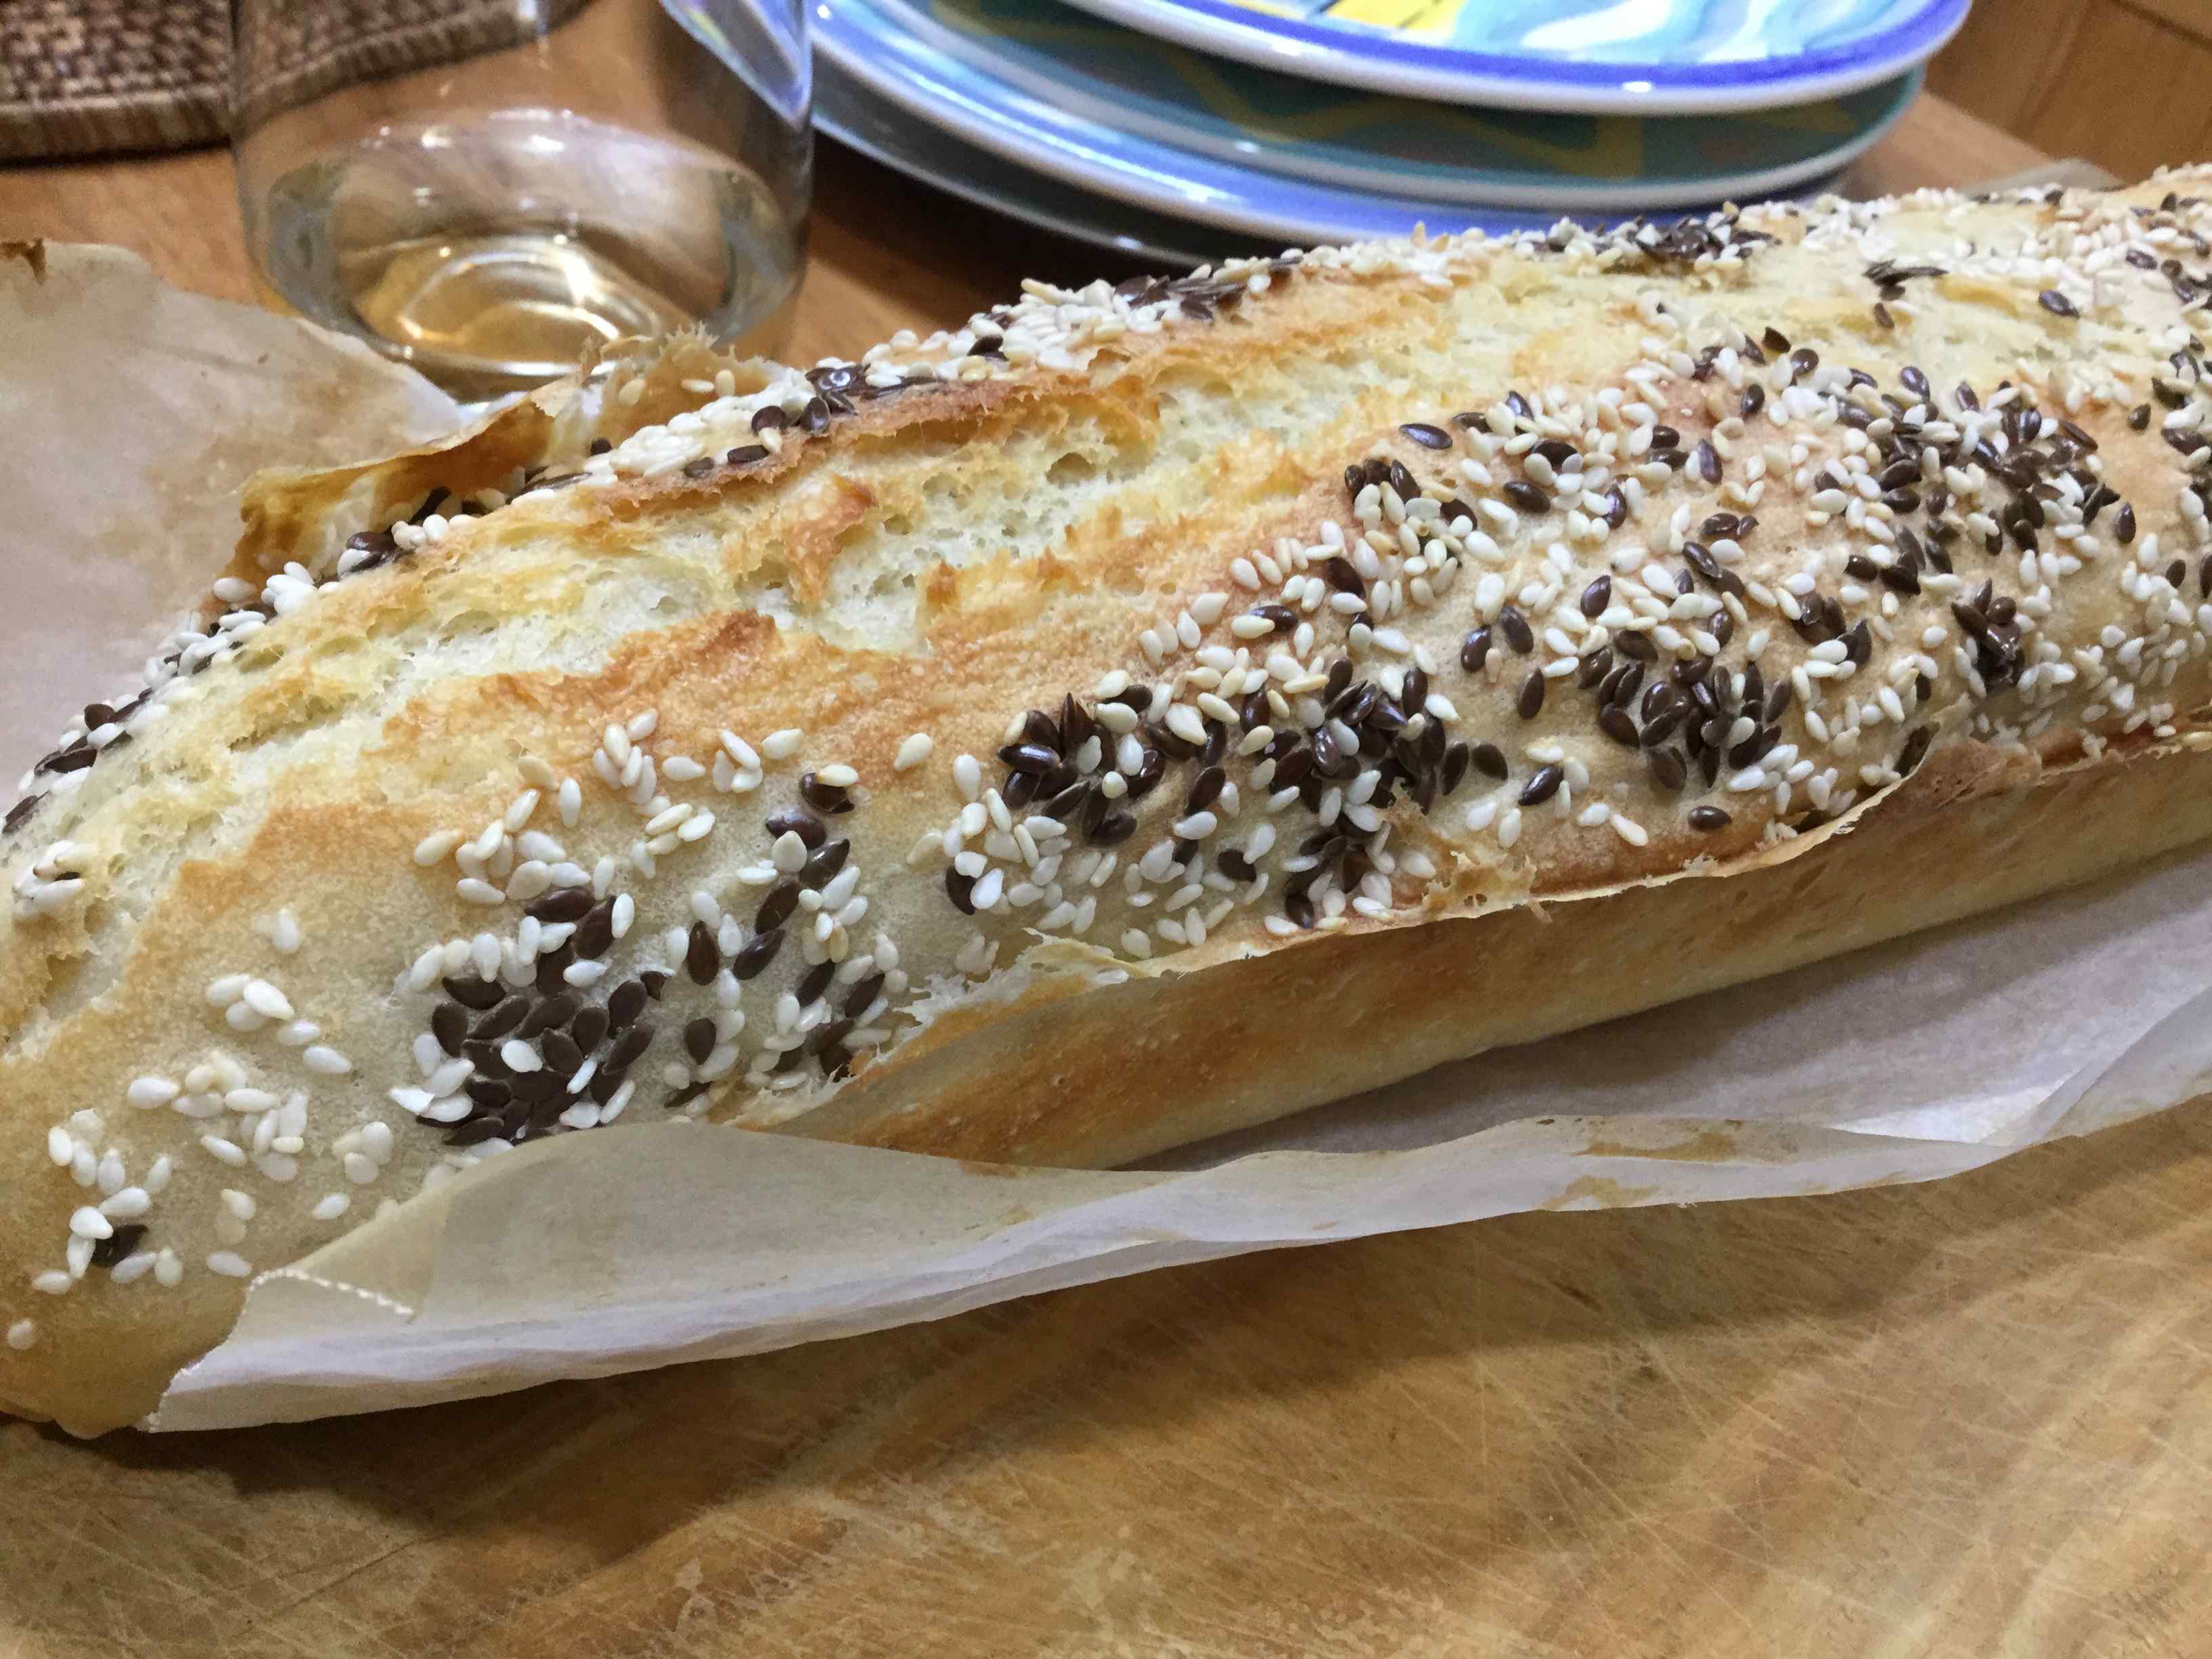
Baguette:
The following photos are of a baguette made using the base recipe of 500 grams and sprinkled with seeds before baking. It does make a rather large baguette – consider splitting the mixture into two. You will need a baguette tin – they often come in pairs.

Fruit loaf:
A blog reader, Leonie, reports that she made a very successful fruit loaf using the basic technique modified as follows. (No photo.)
- 400g white flour plus 100g wholemeal or spelt flour
- 1/2 tbsp salt, 7g yeast plus an extra tsp
- 2 tsps cinnamon, 1 tsp nutmeg, 1 tsp allspice
- 1 cup in total made up of a mixture of dates, sultanas, raisins, currants or dried apricots, in small dice
- 1/4 to 1/2 cup dessicated coconut
- 2 tbsps honey dissolved in 475 ml luke warm water
Combine the dry ingredients, then stir in the fruit before adding the water. Bake at to 220oC for around 50 minutes, but check earlier.
Contributions welcomed!
If you have something that you believe is impossible (read ‘very difficult’) to do at home, please be in touch, especially if you can provide your method and a summary as to why it turned out so well. (Not essential, but provide good quality photos if you have any.)